Traditional Drawing Self Portrait Evaluation

1. Evaluate your skills in drawing your self-portrait. This should be a detailed response – what were you good at, what did you struggle with…? Do you think your work is successful? Why?

In drawing my self-portrait, I think I was good at getting a diverse range of tones to match the actual variety and contrast in the photograph. This gave the portrait more depth, as well as emphasizing the detail. I managed to do this by looking carefully at the tones in the picture and comparing them to other areas, as well as thinking in both small and larger areas, in order to get small details and also larger overall details. I struggled at drawing the fabric as it was difficult to judge the locations and depths of various creases, because there were a lot of creases, and it was difficult to decide which to emphasize or how they naturally fit. I overcame this difficulty by working in small areas, and being careful to think about the shapes, rather than the objects. I think that, overall, my work was successful, as the portrait looks like me, it is a significant improvement from the first portrait that I drew at the beginning of the class, and I managed to capture many details and make a clear depth and shape in the drawing.

2. What has been the most helpful or interesting technique you have learned during Traditional Drawing?

The most helpful and interesting technique I have learned during traditional drawing is the technique of drawing shapes/lines/angles rather than objects/ parts of objects. This is especially helpful as perceived ideas of objects can often be wrong, and it is difficult to transfer them from memory. Thinking this way has been useful for me as it allows me to make a more accurate drawing, as well as adding in more detail, rather than worrying about how it would affect the object– as in the end drawing the shapes allowed me to put together the drawing in a more precise and detailed manner.

3. Write about the process in detail, from taking the photo, to transferring your drawing to the board to finishing your drawing. What choices did you make?

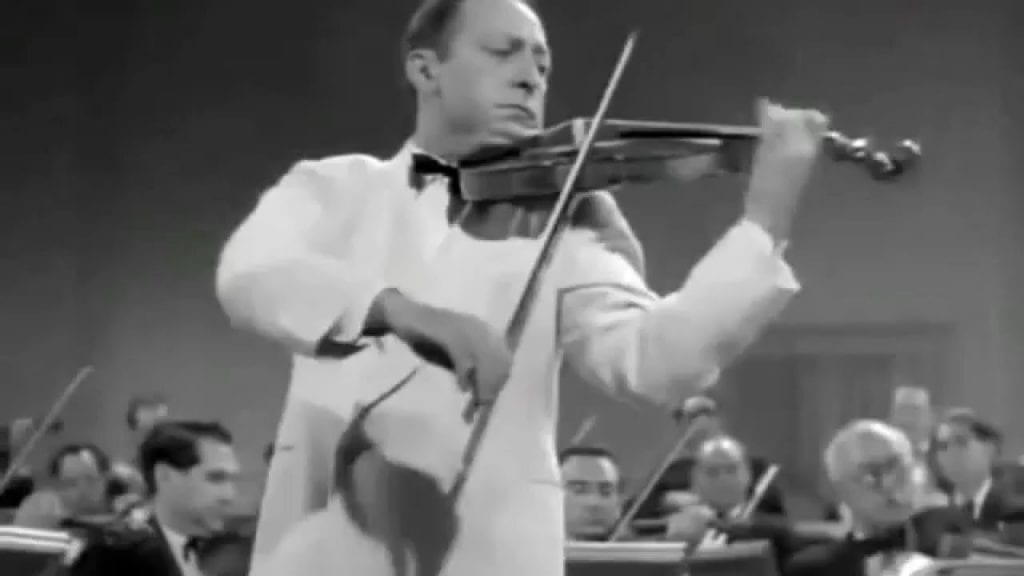
At the start of the process, I researched various portraits to gain inspiration for my own. I looked at the portraits of various professional artists to see their styles and their different compositions. I then decided on what I wanted to be doing in my portrait – I was allowed to use props, so I decided to be playing my violin in the photo. As none of the portraits I had looked at had people playing the violin in them, I researched some photographs of violinists to look at the various angles I could take in order to have the best angle to draw from, allowing significant detail for all parts of the drawing. I chose to have an angle front-on, with both my hands visible so that I would also be able to draw them, but without obscuring the face, and I also ensured that my eyes would be visible from the camera so that I would be able to draw them as part of the portrait. In taking the photograph, we first used a proper camera, but it turned out that the iPhone cameras had more detail in them, so we got a large variety of shots of me playing, taken in a dark room with a light, which maximised contrast. After taking the photos, I looked through them and chose a few which I thought were the best. Some of the things I considered when choosing the photo were the contrast, the detail shown, and the positioning and composition. After choosing the photo, I went onto the photos app and adjusted it so that it was in black and white, and changed the settings to maximise contrast. I then printed the photo.

After practicing drawing myself a few times on normal paper, and on a small sample of the good paper, I moved onto my proper portrait. To do this, I printed out the photo on A3 carbon paper and coloured in the back side of it with graphite pencil. I then taped it onto the good paper and traced over all the significant shapes in the photograph, including shadows, to transfer them onto the page, then took off the photo taped on. Then, I began drawing on the good paper, using the lines as guides, and focusing on the tone and texture of parts of the artwork. I started by focusing in on the details of the face, in each section that I drew starting with a lighter pencil and then progressing to a darker pencil before moving onto a different section. After finishing each significant area of the drawing (head, violin, hands, shirt), I went looked over it again to see if there were any details I had missed and changed a few things, then moved onto the next section. After finishing the drawing, I again looked over it and made a few changes to small details, and got rid of any residue.

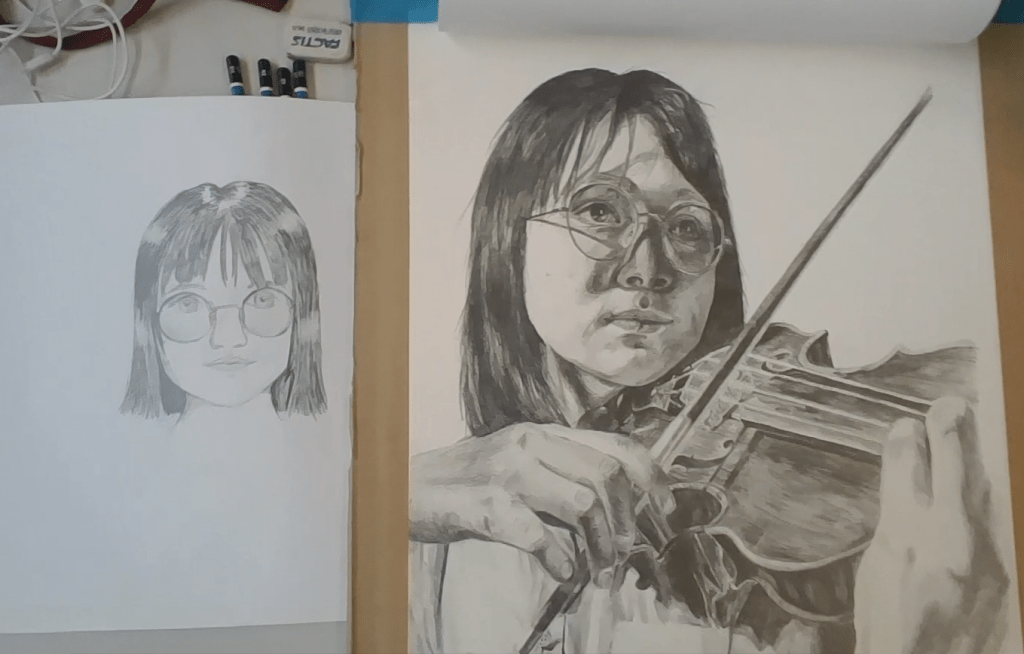
Before (portrait drawn before any lessons) and after (final portrait from project)

Health Project – Road Safety

What one piece of advice would you pass on to young drivers above all else? Why?

Always remain fully concentrated on everything on the road.

I would pass this on as it is key to staying safe on the road – without giving your full attention, driving safely is a gamble for you and those around you, and you can’t tell what you need to do. Although this might seem obvious, it is easy for people to neglect as they can be easily distracted, such as by devices or other people in the car. These sorts of things lead people to become complacent, which results in the lack of attention that causes people to end up in accidents.

People need to make sure their full focus is on the road, rather than allowing distractions such as devices or other people who are in the car, as you could never know if you do something wrong or don’t notice anything, or if someone else does something wrong and you can’t keep yourself safe.

Write down a pledge that you will commit to when you start driving. Why did you pick these things to commit to? How will you stick to these commitments?

I pledge to be fully focused while driving and to stay free from all distractions, in ways such as keeping my phone off, and not engaging in conversation with passengers.

I picked these things to commit to as distraction can largely increase the risk of a crash, and is also one of the easiest things to avoid. This means that I can easily stay much safer by a simple choice, despite the fact that others may not always do this, simply for their own entertainment or lack of self control. Staying free from distraction when driving is something many people may neglect to do properly, but can have a large impact on safety while driving, so by taking simple steps, I can effectively minimise my risks.

I will stick to these commitments by making sure all distractions are away while driving. I will make sure my phone is off before I drive, in both silent and do not disturb mode, and also keep it out of my own reach, such as in the back seat, so that even a lack of self control cannot lead me to use it and thus increase risk. I will also avoid engaging in conversation while driving, so that I can stay fully focused on the road without other people to think about. I can do this by asking any passengers not to converse with me, especially on crowded roads, or if necessary only giving short answers to avoid a continued conversation.

Campaign poster

Science Engineering Challenge Project

In science this term, we worked on a project in which we had to construct a scale model of an earthquake-safe building, using spaghetti and blu tack, in order to learn about the different structures used in the real world to make buildings more safe for people, in order to ensure that they do not collapse in the situation of an earthquake. We first did a 50min design sprint in which we tried to make this building without any planning, in just 50mins, then redid it a second time in the next few lessons in order to plan and make a structurally secure building. In making the model, following the budget of $60 to buy the materials of spaghetti ($1/stick) and blu tack ($1/gram), we planned the design in order to make it structurally secure and to make sure that we could afford it. We then constructed the building out of the materials which we purchased with the hypothetical money, and then afterwards tested its resistance to earthquakes by simulating an earthquake using a shake table, and saw how well it withstood the shaking, measured with a seismometer app.

In the process, we started by planning the model. To keep within the budget, I used the desired height and necessary supports to calculate the exact lengths and sizes for all the parts of the building (e.g. supports, levels, etc) which also ensured that, in building, we cut the correct lengths to avoid wasting material, drawing this up in a design plan. In building the model, we ‘purchased’ the materials and followed the plan with the design and lengths, having one person measure and cut the spaghetti, and the the others to work together in constructing the building, holding and building various parts of the structure, allowing us to successfully build the model to meet the requirements. To improve in the future, we should factor in the unusable leftover cuttings into the plan, as well as considering a way to make it more vertically strong but cheaper, as a lack of blu tack required us to make a taller level which would be less stable. Also, group members should more equally contribute to the plan so we would have more methods to make it stable and also plan the actual coordination of building the model together.

Our earthquake safe building model

Principles of Justice Study – Andrew Mallard

Australia’s legal system is based on a number of principles of justice which work together to ensure equality and fairness and that the rights of people are upheld. These include having equality before the law, high quality of evidence, the right to appeal, and the right to silence. Equality before the law ensures that everyone is treated equally and fairly, no matter their race, gender, income or similar, and ensures that nobody is above the law, so that everyone is protected equally. Using high quality evidence ensures that the decisions and convictions made by the court are reliable and likely to be true, as well as ensuring that they are made due to factual proof rather than a personal opinion. The right to appeal allows people to, if unhappy with a verdict, appeal to have the verdict reviewed and possibly overruled by a higher court, on reasonable grounds. This can happen, for example, if someone believes some of the principles of justice have been undermined or court procedures not followed correctly. The right to silence allows people to remain silent and not answer questions (except for name and address) when being questioned by the police. This is important as, under pressure, people may not be able to answer properly, especially if, for example, they did not have legal advice on it, or they had communication issues. These principles are important because they ensure that everyone is equal in court and that rulings are fair and suitable, demonstrating the great importance of equality in Australia’s judicial system. However, at times, this is not the case, as will be shown through an investigation of the case of Andrew Mallard’s accused murder of Pamela Lawrence. In this case, jeweller Pamela Lawrence was killed with a strange weapon on May 23, 1994, and Andrew Mallard was unjustly accused, after being forced to confess statements by the police. In this case, the principles of justice were largely compromised.

Andrew Mallard

The principle of high quality of evidence was violated in the Andrew Mallard case as false evidence was gained and used against Mallard. This principle ensures that decisions in court are made based off of reliable, high quality evidence to ensure that convictions are correct and are made based off of facts rather than biased personal opinions. When investigating the case, police quickly labelled Mallard as a prime suspect and proceeded to find and even create evidence to prove his guilt. A police officer had even gone undercover to speak to Mallard, and, after inviting him out, convinced him of some certain statements relating to murdering Pamela Lawrence, which he would be later forced to admit in an interview. Some of this ‘evidence’ included a drawing of a wrench as a murder weapon and the method he used to enter the shop where the murder took place. This false evidence they gained was treated as though true, and was used against him as ‘confessions’. The police also neglected vital information that would prove Mallard innocent, and hid it from the court. This included a test which had been done on a pig’s head which had shown that the apparent method of murder would not have killed Lawrence or caused the wounds seen on her. This research was not brought into court and was only found out later. This violation of the principle of having high quality evidence would have been avoided if all the evidence had been brought to the court, and if only reliable evidence was used. These, along with other incidents, violated the principle of having high quality of evidence as false ‘evidence’ was used against Mallard in order to convict him.

Murder victim Pamela Lawrence.
Andrew Mallard

When Mallard was being questioned, the principles of the right to silence and equality before the law were compromised. The right to silence allows people, when being questioned by the police, to remain silent (except for giving name and address), as they may need legal advice first or may be disadvantaged (e.g. by language or mental capacity), and could incriminate themselves if forced to speak. Equality before the law ensures that all people are treated fairly and equally, with nobody above the law, without discrimination based on differences such as race, gender, culture and disability. In the Andrew Mallard case, he was interviewed when he was not mentally stable, and was at one point even in a psychiatric hospital. He was not given the opportunity to have a legal aid and he was not even able to have a nurse with him during the interview. This disadvantaged him, as he was mentally ill at the time, being in a manic stage of bipolar mood disorder and therefore may not have been able to make proper decisions or think properly. Mallard was also denied the right to silence- during his questioning, police fed him statements to ‘confess’, and threatened him to say what they asked, coercing him and threatening to shoot, beat and harass him. These factors caused him to have to ‘confess’ these false statements, as well as giving other information used against him, leading to his conviction. This would not have occurred if he had had a legal aid or other assistance, or if he had been allowed silence in the questioning, rather than being threatened by the police. These examples demonstrate that the principles of the right to silence and equality before the law were compromised in the Andrew Mallard case.

Another principle, the presumption of innocence, was also violated in the Andrew Mallard case. In the primary investigation of the case, Mallard was identified as one of the original 136 suspects. Shortly after, he was identified as a prime suspect after he was interviewed. This was partially because he had committed some crimes previously, although they were unrelated and were petty crimes.  They therefore treated him as though he were guilty, rather than innocent, and tried to convict him based on this belief rather than properly looking at the evidence that turned out to prove his innocence. This led them to do things such as forcing him to confess to the crime, and presenting false evidence from this, as well as, in court, hiding evidence that clearly proved him innocent. This assumption of guilt caused him to be convicted, as, if he had been properly presumed innocent, and treated as so, it would be likely that the police would not have forced him to ‘confess’ and use this against him in order to easily convict him, and the evidence found to prove him innocent would have been immediately brought to court. As a result of this, it can be seen that the principle of the presumption of innocence was violated in the Andrew Mallard case.

The principles of justice are essential to the Australian legal system. These include the use of high quality evidence, the presumption of innocence, equality before the law and the right to silence, as well as many others. These principles ensure that everyone is equal in the legal system, and treated fairly, and to ensure that rulings are as reliable as possible. However, the failure of the legal system to support these principles can lead to people being wrongly convicted, as was the case for Andrew Mallard, in whose case the principles of justice were largely compromised.

Life skills – Job research

In Life Skills, we have been researching different jobs that we find interesting. I chose to research the job of Music Professional (Music Professionals | JobOutlook).

Music Professional

Tchaikovsky – Waltz from Sleeping Beauty, arr. Rachmaninoff

Some of the tasks of music professionals include creating melodic, harmonic and rhythmic structures to express ideas and emotions in music, as well as performing music in different contexts, and directing musical groups to achieve desired effects.

Statistics of the job of music professional

The weekly earnings of a music professional are actually higher than the average
Type of QualificationMusic ProfessionalsAll Jobs Average
Post graduate/ graduate diploma or graduate certificate14.910.1
Bachelor degree31.721.8
Advanced diploma/ diploma11.611.6
Certificate III/IV7.921.1
Year 1223.118.1
Year 113.64.8
Year 10 and below7.112.5
Highest level of education (% share)
Employment outlook for music professionals (no data for 2021-2024)

RAAFA Tech Fair

This semester in InnovatEd, we did a project where we went to RAAFA and showed various types of technology to the elderly people living there.

At the beginning of the project, we came together and discussed ways in which we could show the elderly technology, and came up with different ideas for what kind of technology we could show them. We had to come up with technology that they wouldn’t already know about and that they would find interesting, as well as displaying it in a way that they would understand.
Some of the ideas we came up with were communication and social media services, technology features and accessibility, school technology, useful applications, new technology such as drones and VR, applications for entertainment, AI, and security. We also decided that we would have tour guides showing the people around to different stations.
In the end, we removed some categories to focus on others. My focus was school technology, which was technology that we use in school today. I showed the Classpad, Teams, and OneNote.

Classpad screen from display


Before the Tech Fair, twice we met with a man working there, who discussed with us the elderly people’s knowledge of technology and showed us where the fair would be held so that we would be able to plan a setup for it, as we would need to know where screens and power points were.
For the actual fair, I was originally going to show the actual physical Classpad and demonstrate with that, however, we could not find a good way to display it as there were no suitable cameras, as the Classpad screen would reflect the surroundings and significantly decrease the visibility of what was being shown. In the end, I had to use the virtual Classpad, and display it on one of the large screens. This meant that the elderly people were able to take a look at the physical Classpad while I demonstrated.
Some of the college capabilities that I had to use included problem solving (such as when I was trying to find out how to display the Classpad), collaboration (by working with our peers to come up with ideas for the fair), and organisation (to organise the things such as what we would need for the fair and how we would complete all of the tasks. We did this using an online program called Trello, on which we made a SCRUM).

Trello


In the end, the fair went very well, and the people were very intrigued by the technology that we use at school. They were especially surprised by the Classpad, as, by using it, it was very easy to get answers, and they thought that it was like cheating. They were entertained by the fair and enjoyed using the technology.

Excerpt from the tech fair

$20 InnovatED project

Pen & Paper market stall

In InnovatED this semester, I worked on the $20 boss project. My group included Felicia, Madison and Emily P, and our final products were handmade notebooks, which were customised. Our business was called Pen & Paper. After completing a design sprint and multiple other activities to help us develop our capabilities and skills for the design process, we ideated, creating ideas for what our product would be. We decided on the notebooks, and got the idea approved. We chose to make notebooks as, due to the fact that, generally, customised notebooks are quite expensive, customised notebooks which were much cheaper than usually found would sell well. As we worked through the process of designing the notebooks, some aspects changed, such as the cover material and the method of binding them.

Our final product was a notebook the size of half an A4 page, bound together with thread with a hard black cover, which could be customised with a patterned paper of choice and, if desired, a word/ name written with a chosen font on the front.

At the market, we did not sell enough. This may have been because we were doing pre-orders (due to the customisation) and therefore people may have been less willing to buy it as they were unable to receive it immediately. To avoid this, we could have instead worked harder as a group with everyone helping with the production to produce more notebooks with the designs already on them for people who did not want to have it customised, and would instead be able to receive it straight away. This may also have been because of the advertising – although we did have an online presence, we did not have any pictures of the product online on the advertisements as they weren’t ready in time. Therefore, people who did see the advertisement would have been less inclined to buy the product or remember it as they had not seen the physical notebook. We could have also advertised better by putting up posters or telling more people about the notebooks in real life.

In this project, I had to rely on and develop the capabilities of problem solving, organisation, resilience, and creativity to develop the product. I used creativity to develop the product and ideate, I used problem solving when trying to come up with ideas for how to do things such as binding the books efficiently and attaching the cover, resilience when some strategies were not suitable – to find a new way to do it, and organisation – to efficiently produce parts of the notebook. I could have used the capability of effective communication more as this would have helped to involve all the group members in the production of the product to therefore produce them more efficiently.

One of the obstacles we faced was the method of binding the books – traditional book binding would take too much time, and it would be too hard to sew through many pages at once by hand. To overcome this, we came up with the strategy of binding a few pages together, then looping thread through them multiple times in creating the spine, instead of knotting them together separately. This process was successful.

The stage of the design process we did best was the prototype stage, as we produced a product with a good quality as a test. We could have worked better on the empathise stage as we needed a better understanding of what people wanted – by working harder on this stage, we could have learnt more about what people would want, and we would have created notebooks to be immediately bought instead of focusing on the customisation of the notebooks as pre-orders were not successful.

In conclusion, the $20 boss project was good for developing and learning capabilities and working on the design process, as we used it a lot, and it helped significantly with the production of the production.

The Christmas Market


In term 4, we worked on a project in groups for economics where we made products to sell at the Christmas Market. We received an investment of $30 to start off our business for buying materials to create the products. After selling the products at the market we would pay it back, along with the profit which would go to charity and the float which we were allocated. My group (Amelia O and me) made $64.90 in profit, and the total profit of the whole of year 7 was $1953.

Our products for sale at the Christmas market.

The first step in the Christmas market project was where we, in InnovatEd, got into random groups, brainstormed ideas for what different people would want for Christmas by interviewing each other and researched sustainable and ethical gift ideas. Over the weekend, we also interviewed some other people such as family members about what they would like for Christmas and what they think that other people would like for Christmas. This was useful and important for the Christmas market project as we would learn about good gifts for people and what to make to suit our target audience. This was the ’empathise’ part of the design thinking process.

Next, in class, we discussed what many people wanted for Christmas (from what we had learnt from the interviews) and shared with the class something important or useful we had learnt about that. This was the ‘define’ part of the design thinking process.

After this, we started the ideate part of the design thinking process. This was where we brainstormed ideas for products which we could make for the Christmas market. Some ideas that I came up with were rope bowls, reusable bags made from t-shirts and bookmarks made from ironed plastic straws. Then, we got into our groups and shared the ideas, then chose one to do for the market.

Next, we would pitch to our teacher our idea for the market, and they would decide whether or not to let our idea go ahead and invest the $30 in it. During this stage, we would research the product to see if we could make enough and if it fit in the budget. Then we could make a prototype if we wanted to see if we would be able to make it easily. We ended up deciding to make rope bowls made from macrame cord and rope bowls made from upcycled t-shirts. We were originally going to make sets of the products for people to buy, which is when we came up with the idea of the beeswax wraps to put in the set, but in the end, we didn’t sell the products in sets.

Our products

Next, we would start making the products to sell. Amelia worked on the macrame bowls and I worked on the braided rope bowls. On one weekend, Amelia came over to my house for us to make the beeswax wraps as we were using beeswax from my beehive. Meanwhile, in Digital ICT we made a spreadsheet on Excel to account for things such as the costs and profit/ loss of our products at the market.

In English, we worked on a print advertisement for our products. Before the market, we put them up in the canteen and in some areas at the year 5 and 6 building.

To do this, we learnt about advertising techniques, the types and purposes of advertisements and analysed advertisements.

Then, we sold our products at the Christmas market at lunchtime. Our products sold out, although near the end of the market, when we had two small beeswax wraps left, we had to lower the price from $2 each to $1 each because nobody had enough money anymore.

I think that the Christmas market project was a fun way to learn about economics, advertising and spreadsheets and it was useful that we were actually doing the market instead of just learning about the things in theory. I think that we did well at the market as we sold all our products; they were sustainable or made from upcycled materials and we made a profit of $64.90, which went to the Salvation Army.

Amelia and I at our stall at the Christmas market
Amelia and I at our stall at the Christmas Market

Project Utopia – Reflection

This year we have been working on Project Utopia. In this project, we created our version of a utopia. This is a perfect society, however, the Greek origin of this word actually means ‘no place’, as it is almost impossible to make a perfect society. In this project, we used the information we have learnt about in many subject areas to make a perfect society. This included livability, sustainability, and the United Nations Global Goals.

This year we have been working on Project Utopia. In this project, we created our version of a utopia. This is a perfect society, however, the Greek origin of this word actually means ‘no place’, as it is almost impossible to make a perfect society. In this project, we used the information we have learnt about in many subject areas to make a perfect society. This included livability, sustainability, and the United Nations Global Goals.

We started the Utopia project this year when we read ‘The Giver’ by Lois Lowry in English. This was what introduced the idea of a ‘utopia’. It was the story of a society which seemed to be almost utopian, but throughout the book, we found out things that showed that this was not true, since it is almost impossible to make a perfect society.

Then, in Science, we learnt about sustainability when we made a model of a sustainable house. This was important for the Utopia project because for a society to be perfect, it must be sustainable.

Next, in HASS, we learnt about liveability factors. There are objective factors, which are climate, environmental quality, infrastructure, safety and stability and access to quality healthcare and education. In our utopia, we combined sustainability and the factor of environmental quality. One of our best features for these was the bio bus, which is a bus which runs on fuel made of human waste and other organic matter. Another liveability factor we focused on in our utopia was safety and stability. Since our utopia was near a tectonic plate boundary, we incorporated tsunami and earthquake safe building designs. Some of these were used in the Japan Postal Centre and during an earthquake, it was not damaged. There are also subjective factors, which are harder to measure. These are what people individually might want. For our utopia, we needed to make sure that we included these.

Then we started to individually plan our idea of a utopia. We needed to use what we had learnt about sustainability and liveability to create it. In the creation of our individual utopias, we created a map of a utopia, we filled out a table of information about it, such as the facilities, and we wrote three paragraphs about different liveability factors in our utopia.

Next, we were put into groups for the creation of our version of a utopia. During InnovatED, we learnt about the United Nations Global Goals for sustainable development. These goals tie in with sustainability from science, and liveability from HASS, as these factors are incorporated into the Global Goals. While creating our utopia, we incorporated the global goals, and were accredited for achieving some in our utopia. My group was accredited for 6 goals – no poverty, good health and wellbeing, climate action, life on land, life below water and gender equality.

Then, in our groups, we began the creation of the physical or virtual representation of the utopia. My group created it on CoSpaces. This is an online program which we learnt to use during Digital ICT. Using this program, you can put 3D models onto a ‘scene’, and code them to do things such as moving and telling you information. However, instead of building the entire map, we built key features of it, such as the tsunami and earthquake-safe building design and the sustainable energy farms. However, on the one of the last InnovatED classes, some of the models on the CoSpace turned into red cubes with crosses on them due to an error in the software. We had to use the ASC capability of problem solving to fix this – we replaced these with other models, but we left the original models underneath so the code for showing information would still function. CoSpaces was my favourite part of the project as I really enjoy coding.

While finishing building our utopia, we started a new part of the project in English, where we would prepare a speech about our utopia. We would say this speech in front of the class as a preparation for the presentation, where we would inform guests about what we have created. The speech had to consist of three topics: liveability, sustainability and the global goals. In our group of three, we split these up and each spoke about one of these topics. I spoke about sustainability. For the speech, we had to use skills for public speaking which we had learnt while doing debating in Connected Learning.

Then, in HASS, when we learnt about the constitution and the types of government in civics and citizenship, choose a government for our and created a constitution for our utopia. Our utopia is a constitutional monarchy, like Australia. The constitution is very important for our utopia, as it sets the rules for people to follow, and since nobody is above the constitution, it will help keep people safe, even if the queen, king or government tries to do something bad or dangerous for the utopia.

Then we presented our utopias. For this presentation, we set up a table for the utopia which guests would come around and look at. On our table, we had the flyover of the utopia, which we recorded using Loom and edited using Premiere Pro, which we learnt about in Media; we had the constitution; we had flyers about our utopia, we had the map of our utopia and we had posters about some of the features of our utopia. The guests were intrigued by the earthquake and tsunami safe building designs and the bio bus.

I think that some of the most important information we learnt about during the process was sustainability, as there were many things we learnt that we can easily apply to real life to look after the environment, such as sustainable behaviours like turning the electricity off at power points. Civics and citizenship was also very important in the process, as we learnt about the constitution and the government by actually making them for our utopia.

I found collaborating with the group challenging, as it is sometimes hard to listen to and include ideas from everyone and still have my ideas heard, but in the end, I think the group work went well as we succeeded in this.  

One of the things that I thought went really well was our CoSpace, which was able to represent some of the important aspects of our utopia in detail as information in words and as a 3D model of what the aspects would look like. Something else that I think went well was the speech, since we were able to present the important information we had researched about in the small amount of time. However, if we had worked on the constitution for longer, we could have improved it by making it more detailed or specific, such as adding examples and/or reasons for all the rules they would help make clearer, such as some of the responsibilities. 

In conclusion, I think that Project Utopia was an interesting and unique way to learn about sustainability, liveability, the U.N. Global Goals, public speaking, and the constitution. I am pleased with the end result of our utopia, and I think it would be a nice place to live.