Our Project was to design and create a structure made of spaghetti and blue tack that could withstand an earthquake. The earthquakes lasted for 15 seconds with one representing a p wave and one simulating an s wave. If the structure passed the two 15-second earthquakes it is seen as an earthquake-proof structure or one that is most likely to survive an earthquake.
The limitations of the task was that the structure had to be a minimum height of 60 cm with a platform at the highest point of 5×5 cm the base of the structure also had to be a maximum of 30×30 cm. Another limitation was that each group only had $60 to spend with 1 gram of blue tack costing $1 and $1 for a spaghetti stick.
Costs
Blue tack – $18
Spaghetti – $42

At the beginning of this project, we spent a lesson defining the problem and brainstorming ideas on what we wanted to have in our structure. We defined the problem by looking at the Stile and writing down the different things that we needed to have in our structure. We then brainstormed ideas and small structures that we wanted to build, we also brainstormed a few different things that we had seen before that can withstand earthquakes.
We then began to research different features of houses and buildings that are good for enduring an earthquake. A few of these features included cross braces, strength, good reinforcement, a strong base and equally distributed weight. Some of the research we did was hard to connect to the spaghetti structure because we did not have solid materials or much of them. Although it was hard to connect some things to the structure we were still able to use, cross braces, strength in the base, equally distributed weight and reinforcement, so the structure was almost as stable as we could get it.

Design
After our research stage, we began to make a design and create. We started by making some smaller models to find a good shape and structure and then tested making a rectangle with a cross brace going through the middle, however, it was very tricky and took a lot of time. We then tested making small triangular pyramids and putting them together, this was very stable but would use too many resources in the proper model. We decided to use triangles as we know that they are very strong and have cross braces for extra support. We also had two pieces of spaghetti between each level to give more support. After making a small prototype of what we wanted we then made a final design that we would replicate in real life. we later started building and creating our final structure, this is what took up most of our time and took a lot of patience to get right.
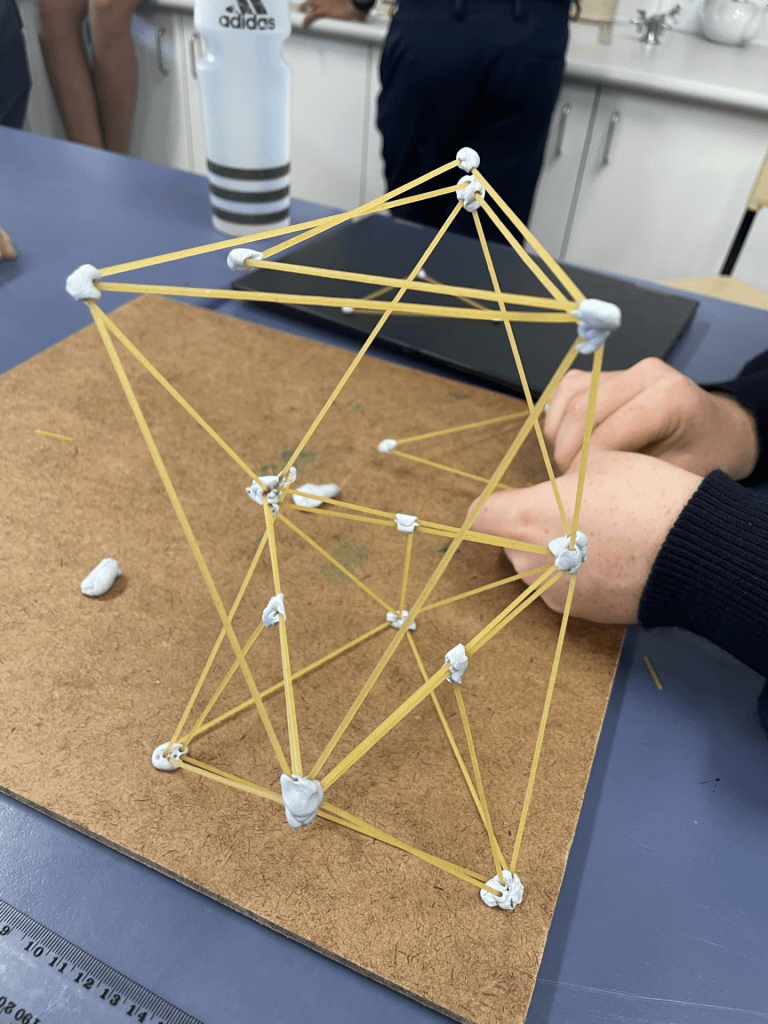
Beginning to build the structure
Finally, we tested, evaluated, and improved our structure. We did this by first shaking the structure lightly to see if it would stay standing and then we fixed the small areas that fell out of place, or we thought it needed some work. After the first few tests we put the building on the earthquake simulator and did the actual test, this caused a few issues and we broke it into places which was annoying at first but it meant that we could fix it later on. We ended up having to add smaller cross bases to the bottom of our structure because we thought that it didn’t have enough support on the bottom to hold up its weight.

Final Structure
At the end of this project, we had a good structure that could withstand an earthquake with both P-waves and S-waves. I think that our group worked really well and although we had days where some people did not do much, we all inputted ideas and came up with a great final model.
This project is important to do because it teaches us about what is important to have in a house or building in areas that are around earthquakes. It also teaches us how to collaborate together and get through problems when we are unsure about what to do. If I was going to do this project again I would try to do some more research before beginning so that I have a really good idea of what is good/bad for an earthquake-proof building. I would also spend a lot more time if I had it on creating small prototypes before moving on to my final draft, this would be helpful because I would know exactly what is bad and what is good.

The first test

Prototype
Our second proper test; when the structure broke.
The final test, before the one in front of the class.