Earthquakes can pose a major problem for buildings, causing a lot of damage. In countries like Japan where earthquakes often occur, solutions have to be made to counteract the effect of earthquakes on buildings. In Science class we were talked with designing a building to effectively withstand the force of a major earthquake. We would make a prototype out of spaghetti and blue tack to evaluate the effectiveness of the design. We were also given some criteria for the building, it had to be over 60 cm tall and fit in a 30×30 cm footprint, as well as being relatively easy to construct, it also had to be within a budget of $60, with blue tack costing $1/g and spaghetti at $1/10 cm. We had to work effectively in a team to create this design, (communication, etc.) and then test it on a shake table, with our end goal being for the building to remain standing (with no damage) after this test, meaning the design could potentially be effective against an earthquake.
Our group: At the beginning of this task the first thing we had to do was assign roles so we knew what everyone was doing, we had a designer, researcher and project manager, the researchers (my) job was to collect information on existing solutions used in earthquake prone areas and to record this information and relay this to the group, the designer was tasked with creating accurate drawings based on the information provided by the researcher and the manager was there to keep the group on track by having dates when we would like to have things done, etc. I think overall throughout the project we worked fairly well together, I think I was more of a realist and was able to come up with practical ideas, based on existing solutions through research and Jet the designer could design them into the building with his creative mind and accurate drawing skills, then able to share them back with the group so we can evaluate their practicality compared to existing solutions and make any changes, the project manager (Sam) was tasked with making sure everything in the project was going well to be completed on time, he also had a more practical view which helped the group as he was able to know how far we should be in the project and what progress we need to make, rather than us spending too long on one area.
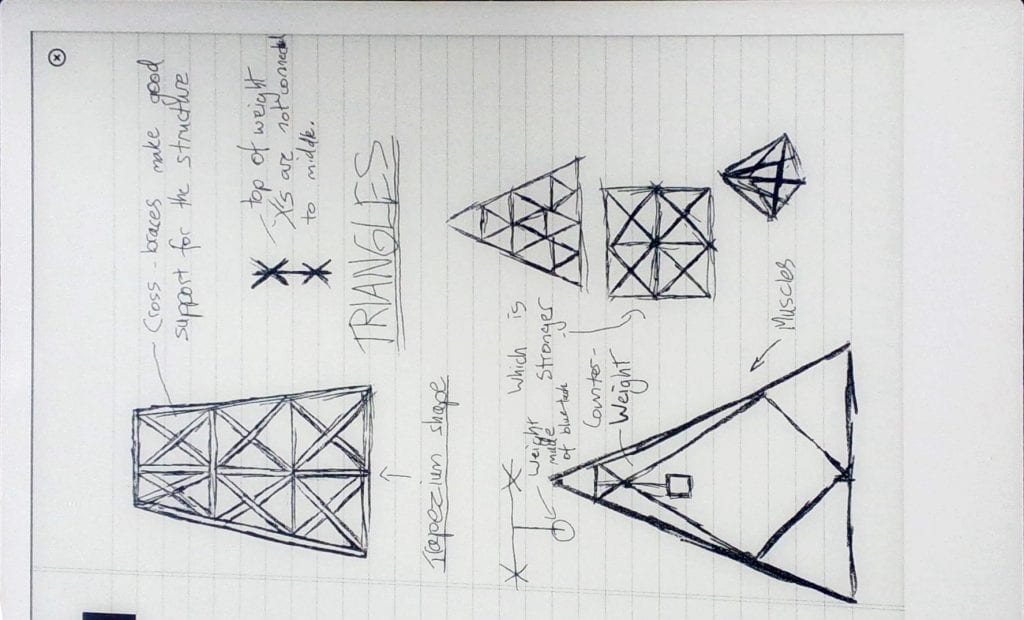
After we had determined roles for everyone in the group, we had to brainstorm some ideas from solutions we knew of and then the next step was to begin researching and making plans for our building and I think we took advantage of everyone’s strengths. For example I did some research and found that a pendulum was often used in buildings to resist earthquakes but once we had Jet sketch it out with all the measurements, when looking at these diagrams we realised that it was too expensive and could not be constructed very easily out of spaghetti (both of which were criteria for the building) and so we decided to not use that idea. Once we had a full design we could then move onto construction. During our first attempt at construction we had the idea of a muscle within the building, which seemed like a good idea even after we sketched it out, but once we began building we quickly realised it was going to be very hard to construct while keeping the building intact, Sam was the one that could see that we were not going to get this finished in a reasonable amount of time, with his more objective perspective and so we ended up altering our design to use cross brackets (an alternative support from our research).

With this design we managed to construct a full scale model, Jet measured out pieces and give instructions to me and Sam as he had created the blueprints and me and Sam could then work on the construction.

Our building being tested against vertical forces
The next step in our process was testing our model on the shake table to imitate an earthquake, as you can see it did not resist vertical forces very well and collapsed outwards, some of the blue tack joints also disconnected. Our design was not very effective overall, as it was not even standing after the tests, so we would have to make some alterations to be able to meet the criteria we were given. Luckily we had researched and drawn up many design options so we were able to quickly create a new design without much further research with a more triangular shape / leaning the sides inwards to stop them from caving outwards (we had already drawn up triangular designs initially which can be seen above), as well as upping each blue tack joint to 0.8 g instead of the 0.6 we used initially to make sure the spaghetti didn’t fall out. When looking at other groups we also noticed that many had quite large pieces of spaghetti on top of their building to reach the height limit, we adopted this, having a much larger single piece standing on top to reach the height, which was far cheaper, meaning we could spend more on extra supports.

As seen in our final tests the changes we made worked quite well, as the final prototype building had no damage after fairly intensive testing and our was in budget, fitting all the criteria we were given
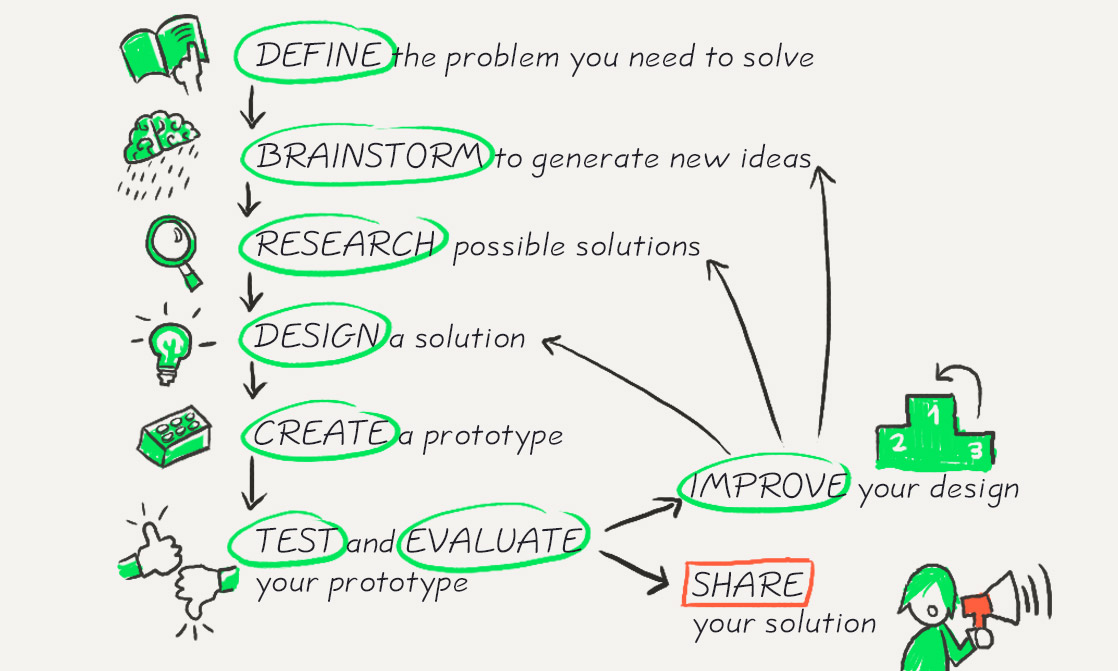
In terms of the engineering process we were given to follow I think there are not too many changes to be made, although I don’t think time should be spent on brainstorming solutions before you do any research as we found when you are not knowledgeable on a topic you cant come up with as good ideas and I would say at least for our group this phase was not worth the time. In terms of our group specifically, although we were keeping track of time we underestimated how long of a process building would be (we kept knocking our building when we were building), we also had to start from scratch with our revised design as in our first tests the building completely collapsed, this meant we had to rush the creation process and for example many of our measurements were off because of this rush, which make the building slightly more unstable. In future it would be better to allocate more time for the creating phase, to allow for delays (such as the collapse of our building) as we probably spent more time than needed designing, that would be better spent making sure that our actual build was as close as possible to our design (otherwise the designing time would not be useful anyways) as even though our final building was not damaged I think it could have been much more stable / easier to construct had we not have had to rush our measurements and build.
Overall in this project I think we worked effectively as a team to meet the brief we were given, but the process we went through could be improved to have future projects go better / more smoothly.