This semester our task was to create an amulet which is a piece of jewellery or ornament worn by people to ward off danger and evil. We did this through using soap, resin, and silicon during different parts of the process.
Inspiration + Designs
Firstly we had to find inspiration for our own amulets. I was inspired by organic and natural shapes in the environment, as well as a minimalistic aesthetic. I found images from the internet, and also in sculpture artist magazines.
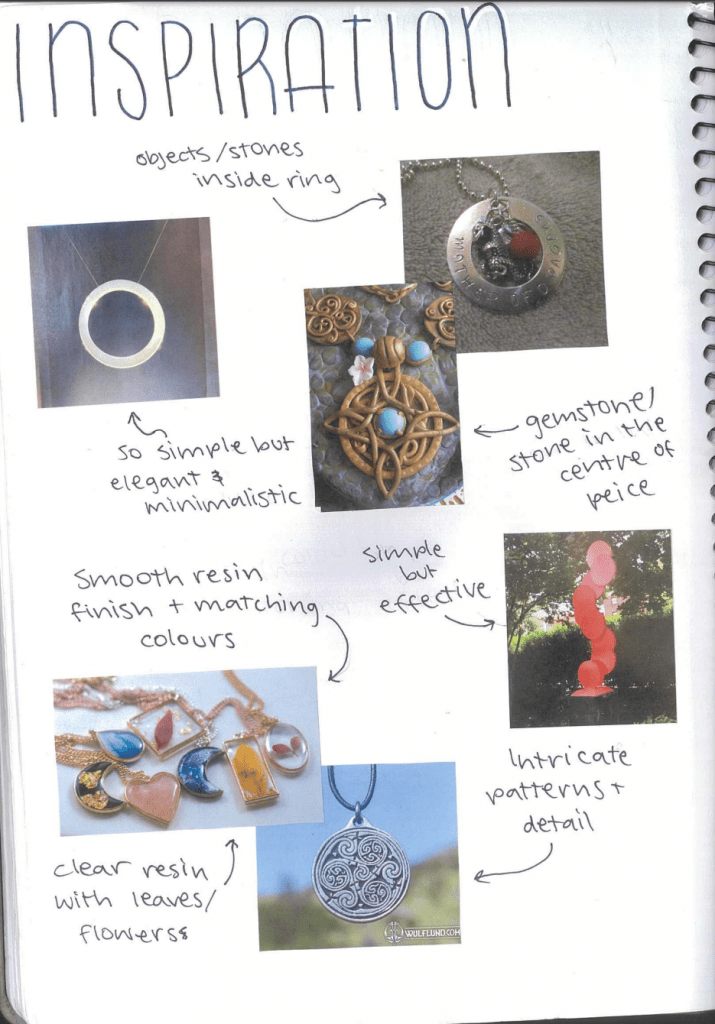
Inspiration Pages from my Visual Diary 
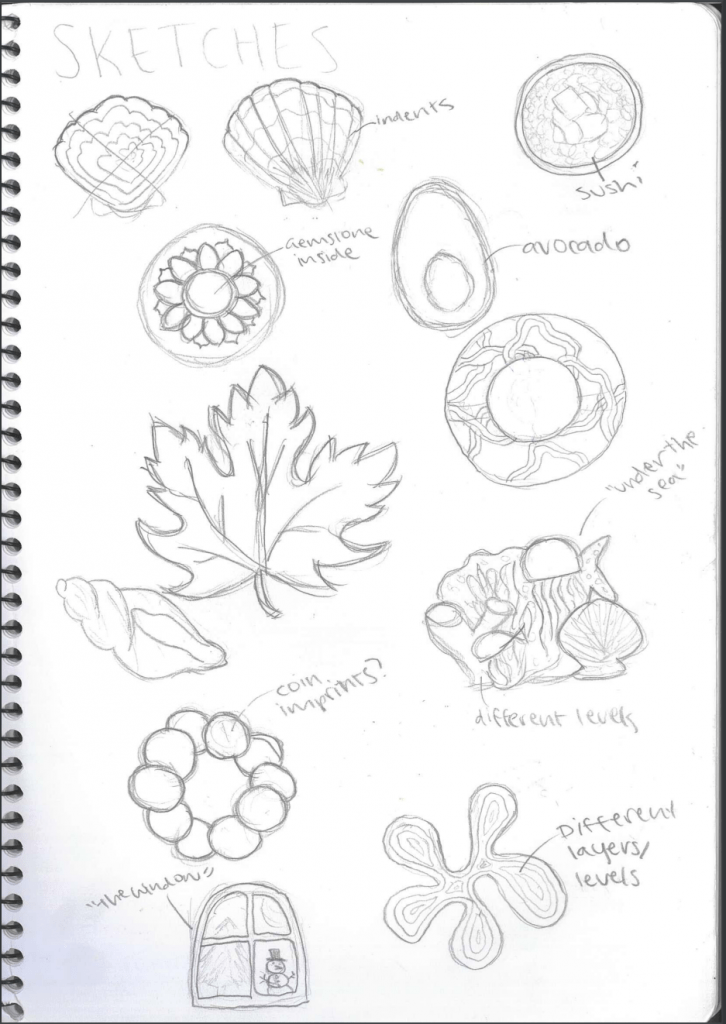
Brainstorm of Different Amulet Designs
These inspired my own original sketches of designs. I brainstormed multiple designs, however I had to exclude the ideas that I thought would be too difficult to achieve in the time span that we had. The size of the soap also needed to be considered and restricted many of my ideas.
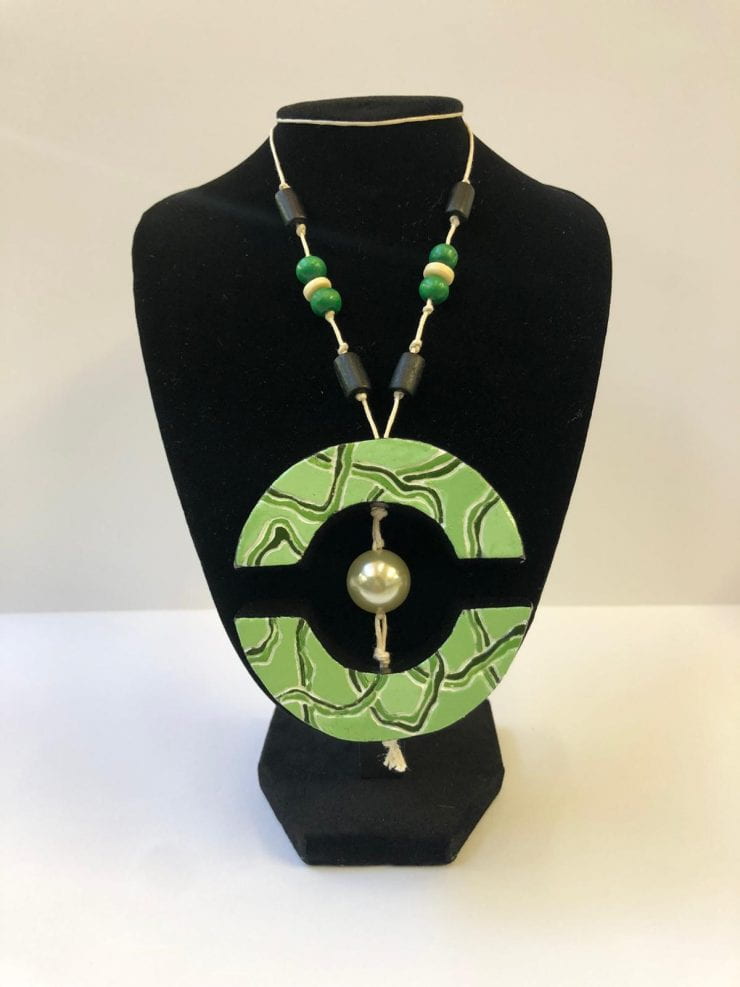
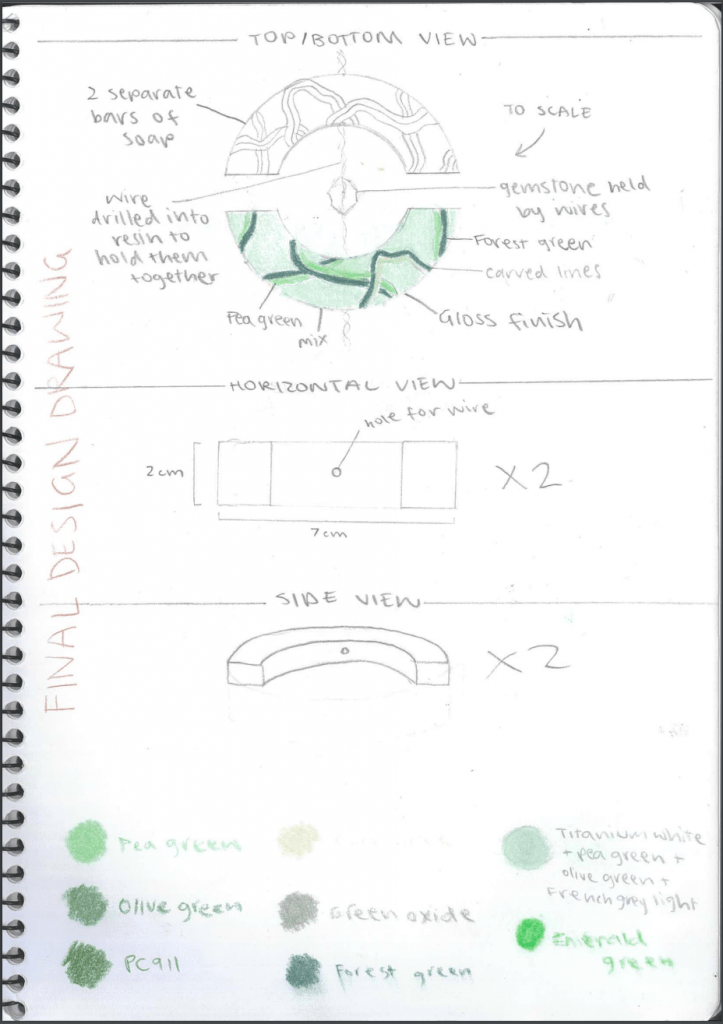
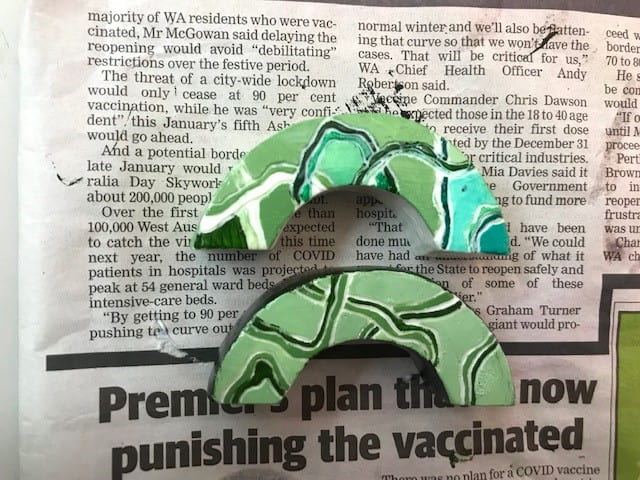
My final decision was this design (shown on the right):
To create this amulet, I used two different soap bars to create the two different semi rings. This required me to work efficiently and fast to get it done. It was only afterwards when I was creating the mould, that I realised I didn’t have to make 2 separate soaps, but only had to create 1 and use the mould twice. This would have saved my time and effort, however by creating 2, I was able to have 2 different designs on the amulet.
The two amulets would be joined together by a wire or string and have a bead or gemstone in between the two.
Silicon Mould + Resin Casting
To create our final design, we needed to make a silicon mould of our soap carving. A wall had to be built surrounding our amulet to contain the silicon. Once the silicon set, the walls had to be pulled off, and the soap amulet inside it had to be removed.
The mould was then ready for resin to be poured into it. The resin had to be mixed together and poured into the mould in a span of a few minutes. Once it is poured into the mould, the mould should be tapped lightly to remove any air bubbles, then set aside to let the resin harden.
Paints and Varnishes
I casted a draft set of my amulet to test different colour combinations and different finishes. I used acrylic paint to mix a variation of emerald green tones. I also wanted a glassy, ceramic gloss finish. I tried various gloss finishes such as using Modge Podge, 2 different types of Gloss Varnish, and Clear Lacqure. I found the CLear Lacqure the most effective in creating the finish I wanted and also the easiest to apply (through a spray can).
Testing colours and varnishes 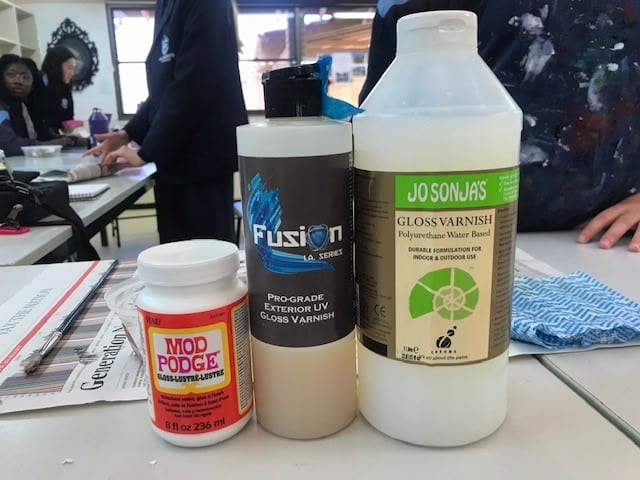
Different Varnishes
Final Product
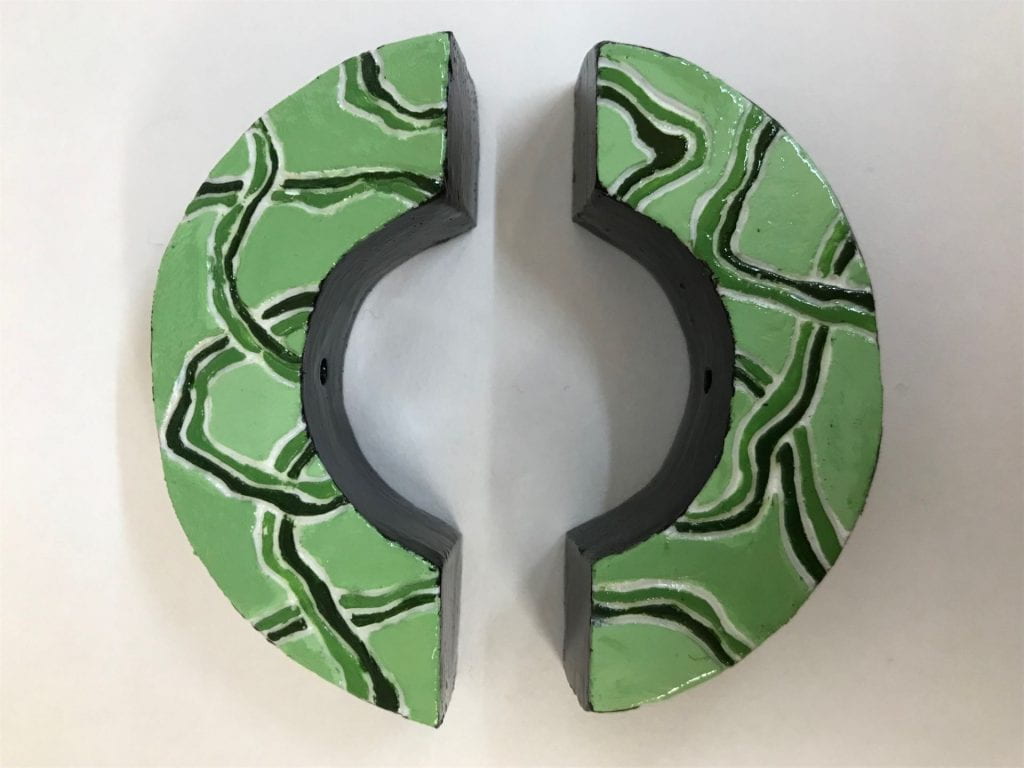
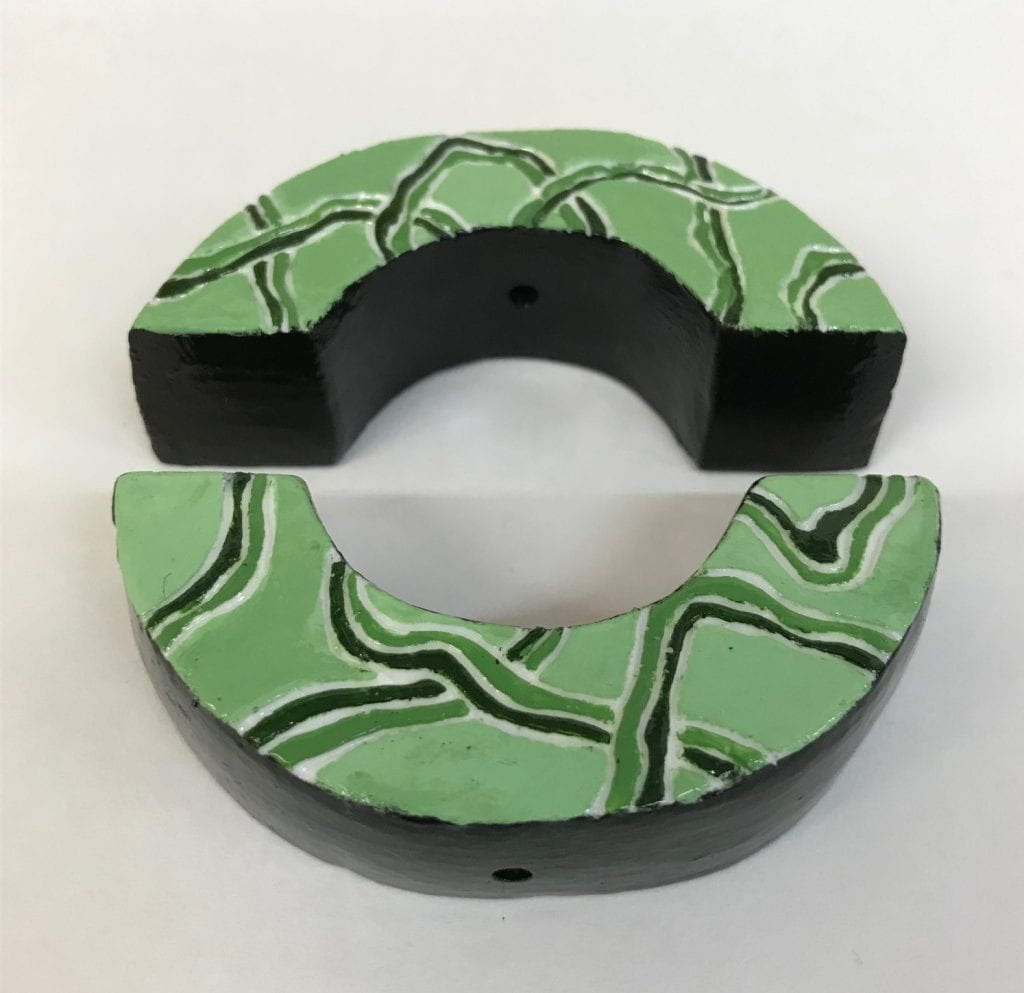
These are both parts of my final amulet. I have not completed the finishing touches to join them together, or decided how I will present it as a necklace. However, I am happy with how the colours and varnish turned out. One of the trickiest parts of this process was painting the carved lines on top of the amulet. This is because it was such a fine detail, and I needed a thin paint brush and a steady hand. Because the lines were so fine, when I was carving it out of soap, some of the soap in between the lines crumbled, and made it very hard to paint. If I ever got the chance to recreate it, I would make the lines thicker to avoid the same problem.
Organisation/Time Management
During this project, I had to use my time wisely by being organised. This is because all the aspects of the process (carving the soap, creating a mould, casting the resin, painting and applying varnishes), took lots of time to dry/solidify. I efficiently used my time by multi-tasking especially when my resin was drying where I used the time to test different paint combinations. I also sped up the time it takes for paint to dry by using a hairdryer. If I hadn’t done these things, my amulet would not have been completed on time.
Such a great post Genevieve! Great explanations of the process, with some media which really tells the story. Really nice final product too – thanks!