The theme for our media project this term is surrealism, and our task was to create a short film exploring the ways to make a surreal world through media. Our project is about a girl who enters a magical portal though a locker and is transported to a surreal version of the school. The girl has to complete a lesson in order to get back through the portal and be on time for her next class.
Planning Process
We came up with this idea by just throwing some fun and random ideas around since that’s what surrealism is about and then built on top of them. We started off with a basic idea of having a portal in a different realm and from there went through the different scenes, brainstorming what random things we could do in them. After we randomly came up with all the ideas we went through the entire thing and picked out things we didn’t quite like and came up with better ones.
After we came up with all the different ideas for our scenes we used Celtext to write our script. Celtext helped us a lot with our planning since it helps us format our script just like an actual script would be. Along with a script we also made a story board this helped us get a idea and a picture down of what the scenes were going to look like. This helped us since we could refer back to it and check off all the scenes we had done.
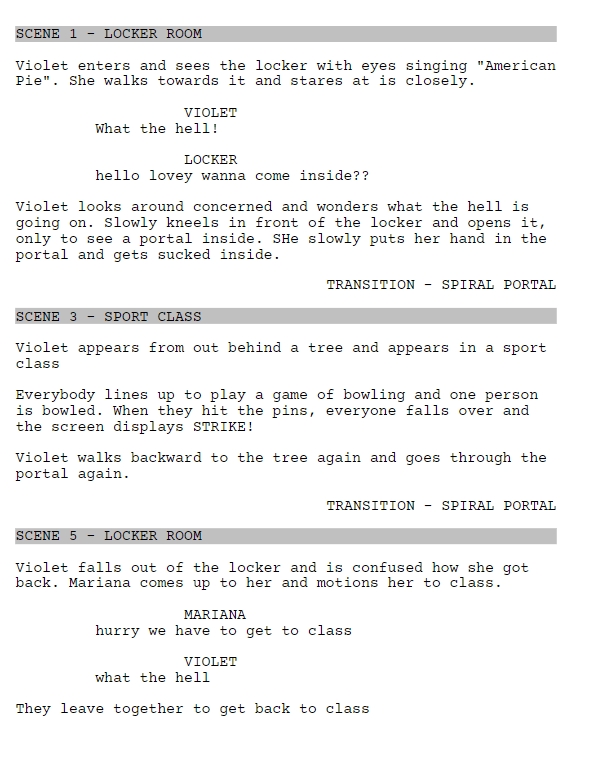
our script written on celtext 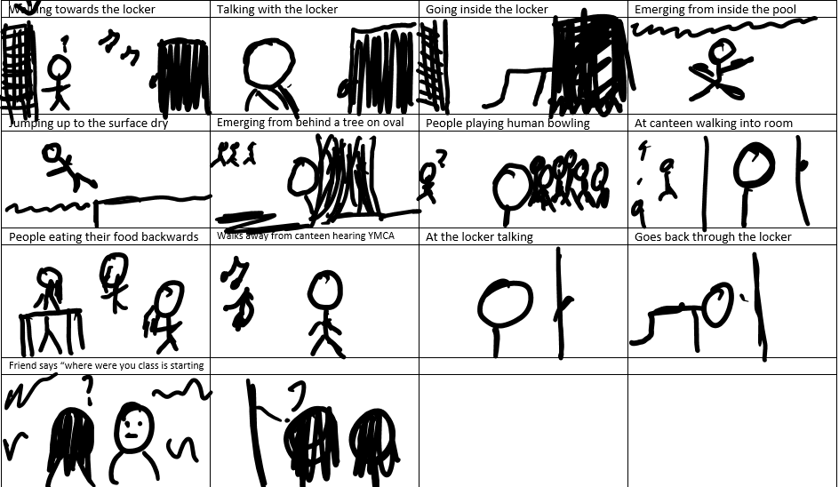
the story board we created to help us plan our scenes
Production Process
Once we had our script planned out we started filming. We used a film camera from the media classroom and a tripod to film everyone of our scenes. We used the tripod to change the level of the camera and keep the recordings from shaking. It worked really well because none of our scenes were badly shot and not focused.
For each of our scenes we decided to film based off of its location so we didn’t have to run from place to place as much. To film every scene it took us around 2 weeks since we had to refilm majority of our scenes. We had to refilm most of them because our camera didn’t want to connect to our laptops so that set back our schedule quite a bit.
Post Production Process
Once we had all of our scenes filmed and on our laptops we went into the Post Production Process. This step is where we edit all of our clips together using Adobe Premier-Pro and add any graphics and transitions we need. We edited together the clips by dragging them onto the track and placing them in order of how we wanted the film to run.

From there we began adding graphics and effects to certain areas to make the film run smoother and give the real surrealist impression. The main graphics and effects we used was fading and text. We used fading to join the videos together and the text was used to help create the idea of us being in a wii game for the sports scene.
What I would do next time would probably be editing a lot better. From the start we all knew that neither of us could really edit and left it to the last few days to do. For next time I would definitely want to learn more things about editing and how to do it, so it takes half the time and looks better.
Another thing I would do better next time is playback the clips after we had filmed them multiple times so we can see if there is anything wrong with the footage, so we don’t have to refilm majority of the scenes all over again.
Overall this film making process was one of the most creative but challenging projects I have done in a while. Going into it I didn’t have very much experience but my group members helped in developing my skills and showed me a new side to film making I hadn’t otherwise known. I am really glad I had to opportunity to work on this task because it helped me finetune my film making skills and transform my wild ideas into something real.