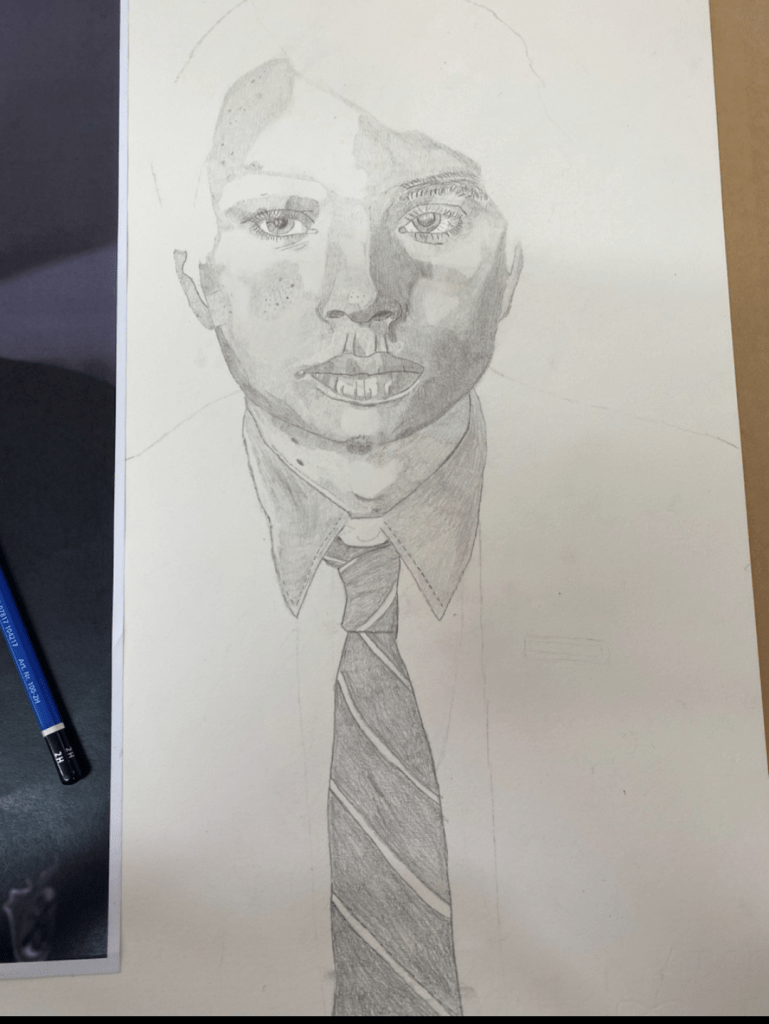
Six weeks of progress into my self portrait
- Evaluating skills
Although my artwork is still a work in progress, I’m delighted with the significant progress I’ve made throughout this course. I’ve managed to execute shading quite well, effectively highlighting the distinctions between different skin tones and shadows, although there is room for improvement in achieving smoother transitions. One of my main challenges has been capturing prominent facial features, such as the mouth and eyes, without relying on harsh lines that detract from the overall aesthetic. Additionally, I’ve encountered difficulties in shading the lighter areas of my face. Instead of leaving them blank, I attempted to darken them slightly by smudging the pencil, but I’m not entirely satisfied with the outcome.
Considering my historically poor drawing skills and limited artistic abilities, I’m actually quite pleased with my efforts. Previous attempts at self-portraits have been far from satisfactory, making my current work pleasantly surprising. While it may not be a masterpiece, I acknowledge that a more skilled artist could have produced something even better. However, based on my personal standards, I consider it a success and a testament to my progress.
2. Techniques
Throughout this course, I’ve had the opportunity to acquire a plethora of fascinating and invaluable techniques that have significantly elevated and advanced my artwork. I’ve gained a comprehensive understanding of shading techniques, mastering the art of using an eraser to create reflective light effects. Additionally, I’ve honed my skills in capturing various elements, including intricate hair, expressive mouths, and noses, as well as accurately depicting different perspectives and scaling in my drawings.
Among the myriad of techniques learned, the most captivating and beneficial to me has been the exploration of perspective drawings. Although it remains an area in which I face considerable challenges, the lessons and dedicated practice we engaged in proved to be remarkably helpful. As evidenced in my self-portrait, I’ve successfully implemented some of these techniques. Moreover, I’ve skillfully applied the rest of the acquired knowledge throughout numerous drawings completed over the course of this semester.
3. Process
The initial step in creating my self-portrait involved capturing a reference photo. To ensure optimal lighting, we conducted multiple attempts within a well-lit closet in the art room until we achieved a favourable angle. Once obtained, I printed the photo in A3 size and proceeded to mark the back of it with a thick black pencil. Placing the marked photo on top of the paper I would be using, I meticulously traced the outline of my face. This transferred a pencil outline onto the paper, providing a reliable reference for the placement of facial features.
Starting with the shading of my skin, I established the desired darkness for both the highlights and shadows. Progressing further, I focused on each individual facial feature, employing the techniques I had previously learned in class. Although not depicted in the photo above, I have recently commenced work on the challenging task of capturing the intricacies of my hair. This involved creating a darker base layer using a variety of pencil strokes, smudging it slightly with a blending tool, revisiting it with another pencil to refine the strands I had missed, and ultimately incorporating highlights using an electric eraser.
Throughout this intricate process, I confronted numerous choices regarding the level of shading, the order in which to approach different facial features, and where to initiate the work on my face.
.