
Project overview
For our final assessment of the year, we were split into groups of four and tasked to engineer an earthquake proof structure using only raw pasta noodles and blu tack. Throughout the project, we had to design, build then test a small-scale model. The structure had to meet this criteria:
Quick and easy to assemble
A minimum height of 60cm and maximum base size of 30 x 30 cm
Remains standing after simulated earthquake (10 seconds)
Is constructed from the materials provided by your teacher for below $60
The materials provided had certain costs to them. A single noodle cost $1 with a gram of blu tack also costing $1.
Before beginning the design process, we had to divvy up the different roles. These roles were project manager, reporter, speaker and equipment manager. I was chosen to be the reporter of the group, which involved me ensuring that the final presentation was finished by the deadline. In the end, we weren’t required to make a presentation, meaning I spent more time helping other group members with their roles.
Design Process
The first step of our design process involves defining our goal, along with any limitations.
Earthquakes are catastrophic natural disasters which have devastating effects on both people and infrastructure. Over time, builders have slowly started to develop ways of preventing damage and loss of life caused by earthquakes. We are tasked with following various improvement methods to design our own earthquake-proof structure.
Some limitations which comes along with this challenge can be seen as a pasta noodles structural integrity. They are very flimsy and snap under even the slightest bit of pressure.
The next part of the process was our brainstorming phase. Below is my groups brainstorm:
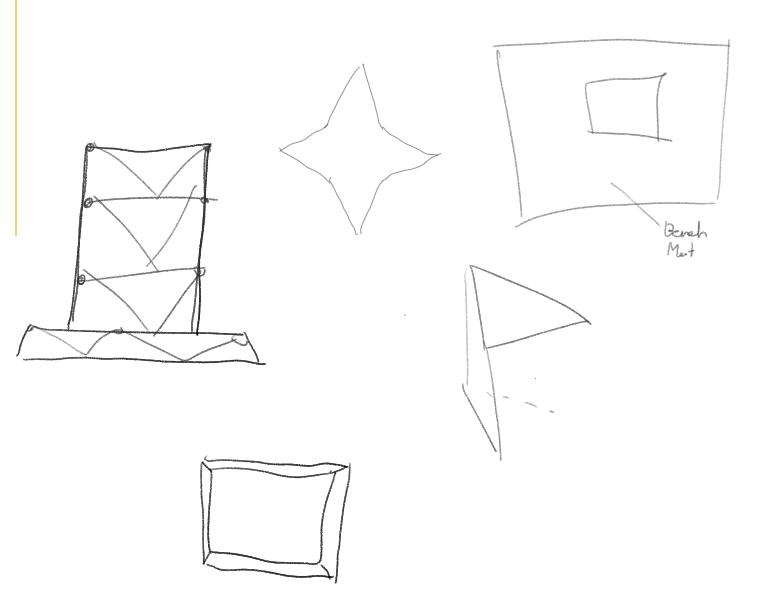
The brainstorm was able to open our eyes in terms of what structures would be the best option to create. Cycling through different variations outlined what ones would work and what ones wouldn’t. We also had to keep in mind the integrity of the pasta sticks, with them often breaking under the slightest connection with anything but air.
For our group research, we searched for what shapes would offer our team the best support when building high structures. After looking through many websites, we were able to determine that a triangle base would provide the support that we needed. Research showed that when a force is applied to one of a triangle’s corner, it is distributed evenly down each side. The two sides of the triangle are compressed and the third side is pulled / stretched sideways, creating an equal load shares throughout the shape.
Whilst researching, I came across the idea of cross bracing. Cross bracing is a system in which diagonal supports intersect. It can increase a building’s capacity to withstand seismic activity. Bracing is important because it helps to keep a building standing. Cross bracing is usually seen with two diagonal supports placed in an X shape; these support compression and tension forces. Depending on the forces, one brace may be in tensions whilst the other is slack.
For our design, we implemented our research to create an initial prototype.
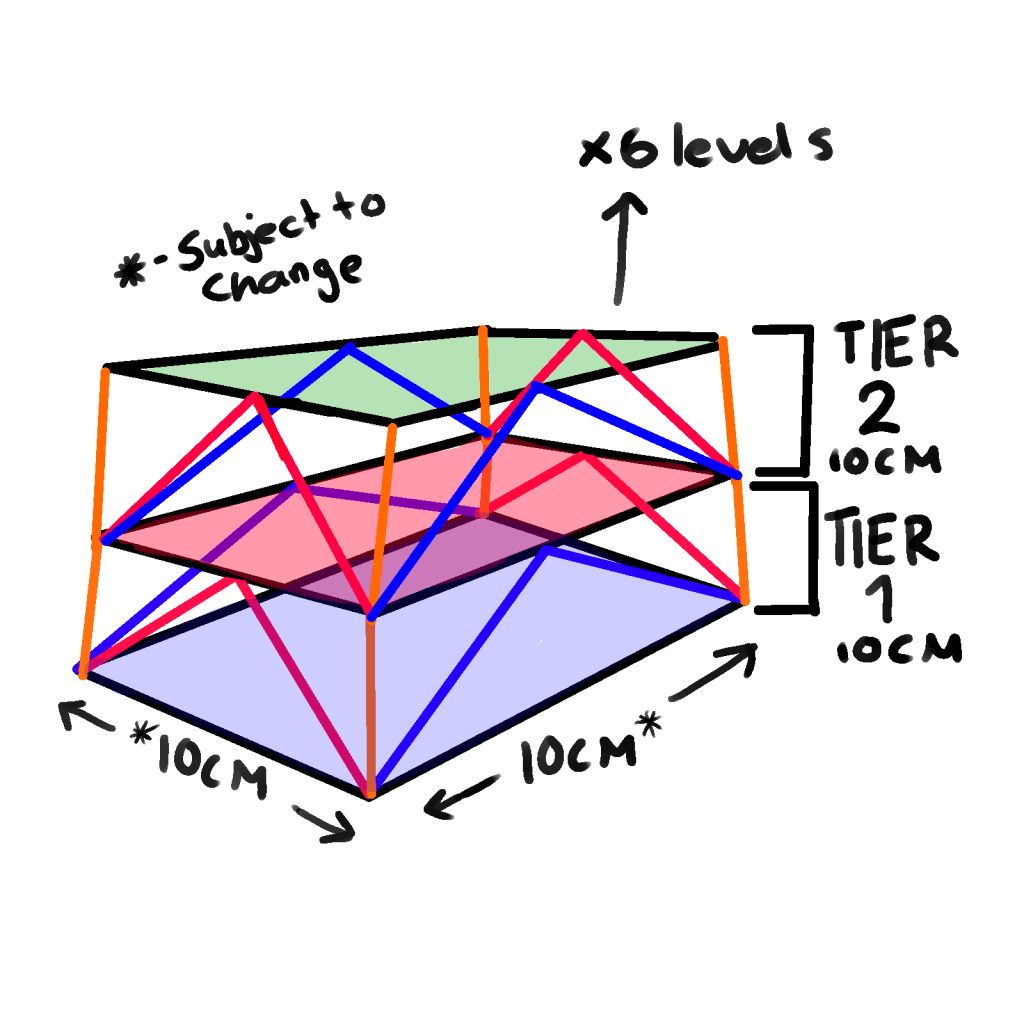
As can be seen, our initial prototype consists of a cross brace design to improve overall stability. We also thought that double stacking our exterior sticks could also offer an extra level of support for our structure. Our initial design had a low cost to create it in full, with only about 4-5 pasta sticks being needed to create each tier.
I didn’t get to partake in the creation of our structure, as I missed the days which we built on. I did however get sent photos from my group members showing the final product.
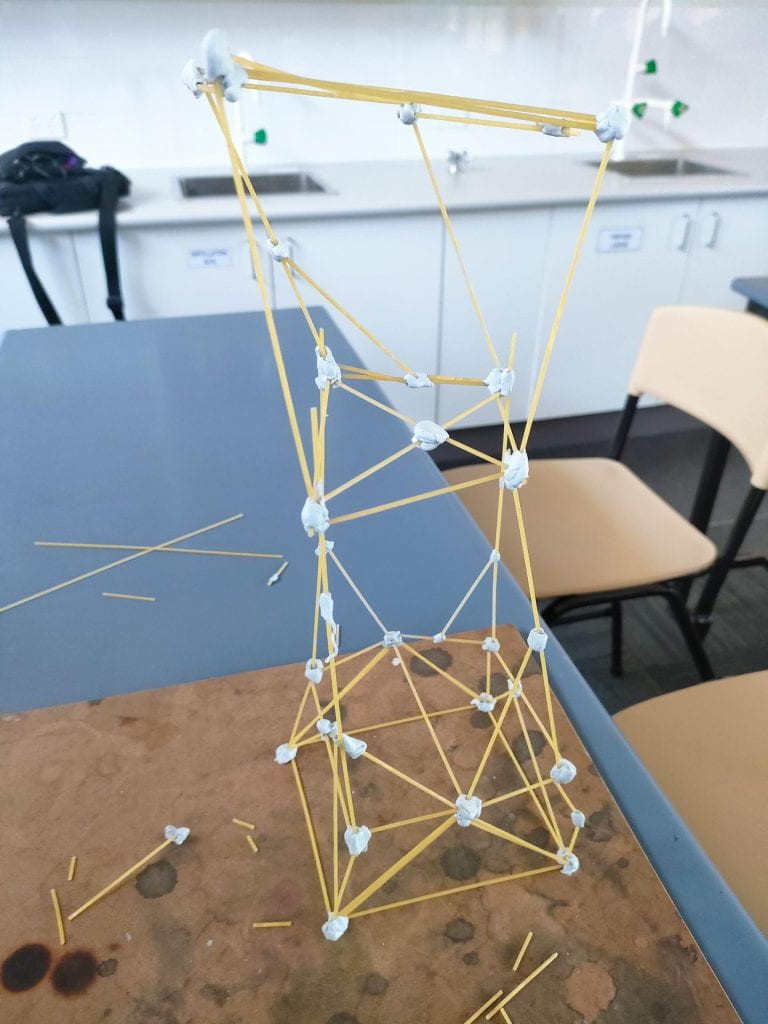
As can be seen above, our final structure looks slightly different to our planning. However we didn’t stray completely from it, with the theme of cross bracing still present throughout in the base and the top tier. A triangle shaped was also implemented to the side of the structure to better share the weight and make it overall sturdier. Referencing back to our research phase, the idea of a triangle shape is featured.
During our testing, we discovered many problems which affected our structures overall earthquake resistance. Previous damage which had happened to our structure by a third party also may have played a part in this. Our base was shown to be very sturdy, with it staying solid and upright throughout both p and s wave tests. The area which our structure faulted was with its upper “sections”. They were very flimsy, which may have been due to the damage sustained before the tests, but photos of our structure before also show that it was the area of our structure which was lacking compared to the rest of it. Although it didn’t collapse during the tests, any further amount of time under stress from the earthquake would’ve caused it to collapse.
As we were still able to conduct simple tests, I still feel as if the damage to our structure greatly affected our testing and didn’t leave us with fair results in which we could actively reflect on and determine which areas of it struggled or which areas exceled.
Pages: 1 2