This semester, I learnt the processes and skills of working with paper clay in the elective of ceramic hand building. By the end of term 1 I had created a collection of pinch pots and by the end of term 2, I am aiming to complete a large slab pot.
The Creative Process:
There were many steps in the creative process of producing a clay pot and developing different textures and designs for it.
- Experimenting
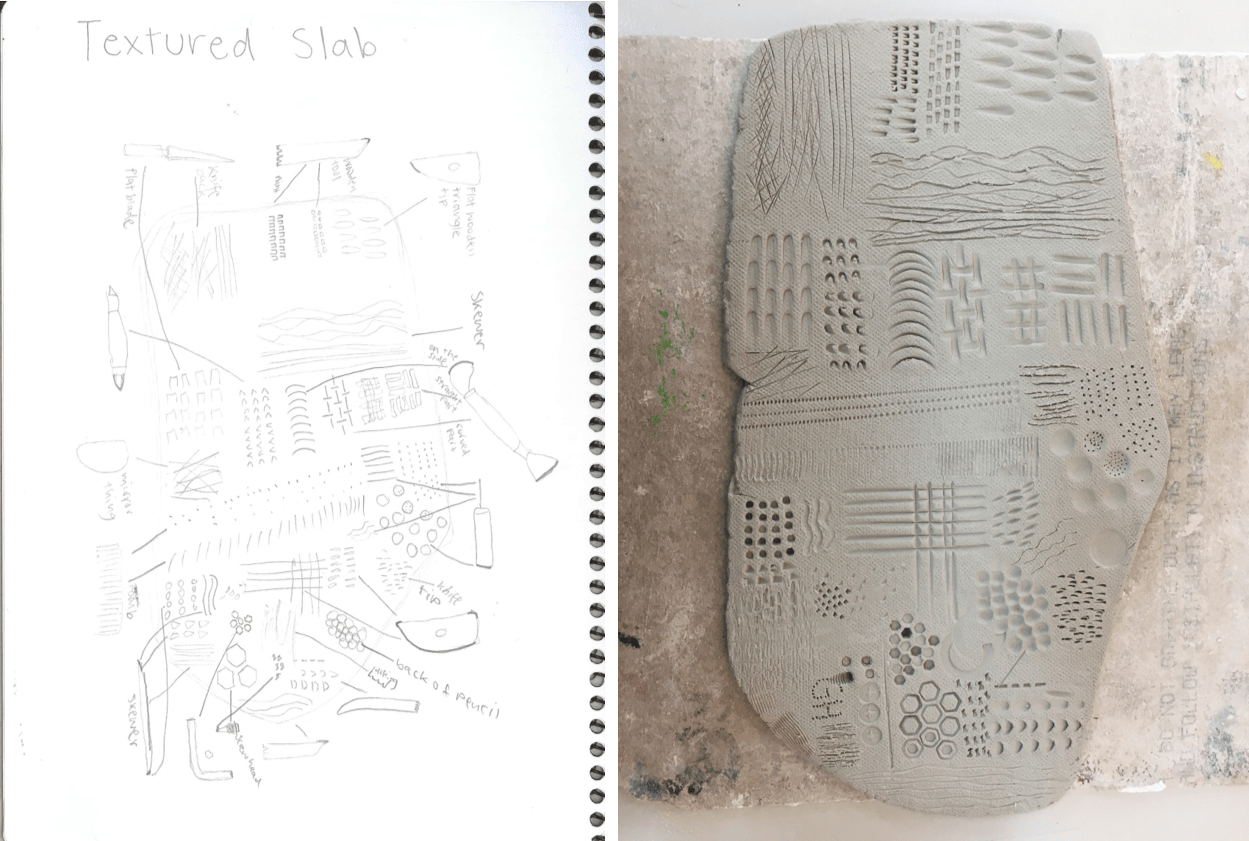
To start with, we created different textures of clay by rolling out a clay slab and used various tools and objects to form a variety of textures. During this process, I had a happy accident where I used my pencil and started to poke the back of it into the clay. It created a really unique pattern and gave the clay an organic design (which I loved), and I ended up using the same texture for one of my final pots.
The colour and gloss glaze is another component of a clay pots appearance. We experimented with multiple test slabs of different coloured underglazes. I learnt that this an important process as the colour can slightly change once it has been fired. We also tested what the effect of a gloss glaze had on the colour of the underglaze and the shiny appearance of the resulting clay product.
2. Inspiration
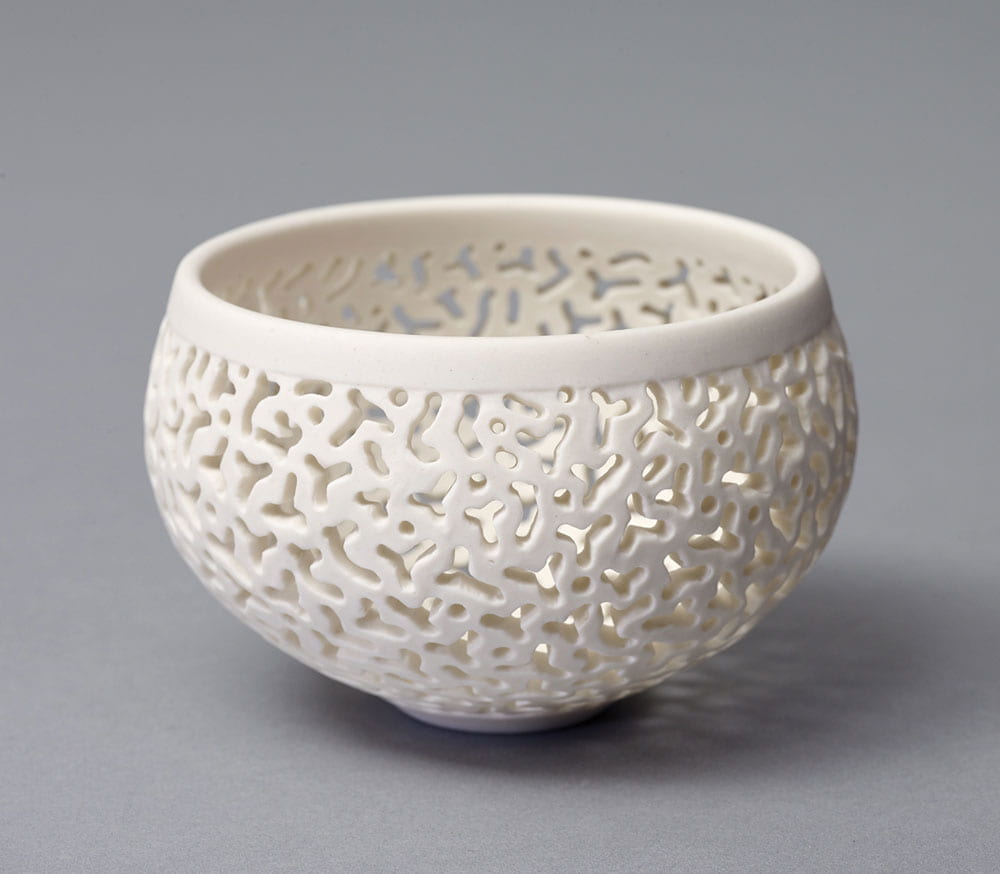
We viewed some amazing clay artworks by Sandra Black and Graham Hay online. I was initially influenced by Sandra’s intricately carved porcelain vessels and wanted to adapt her style in my artwork but found it very difficult. I then understood why she is one of Australia’s best ceramic artists.

3. Pot designs
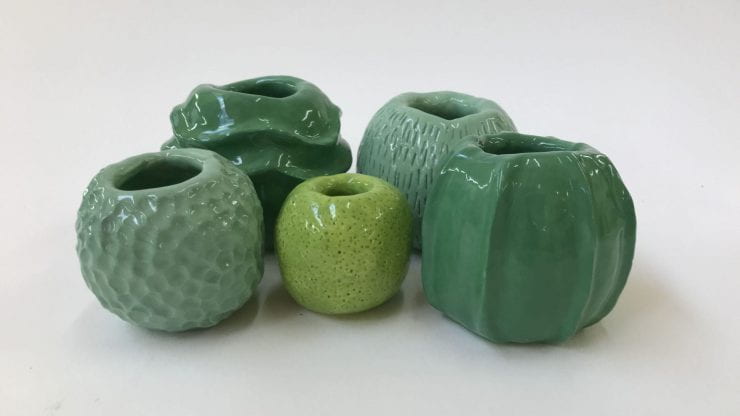
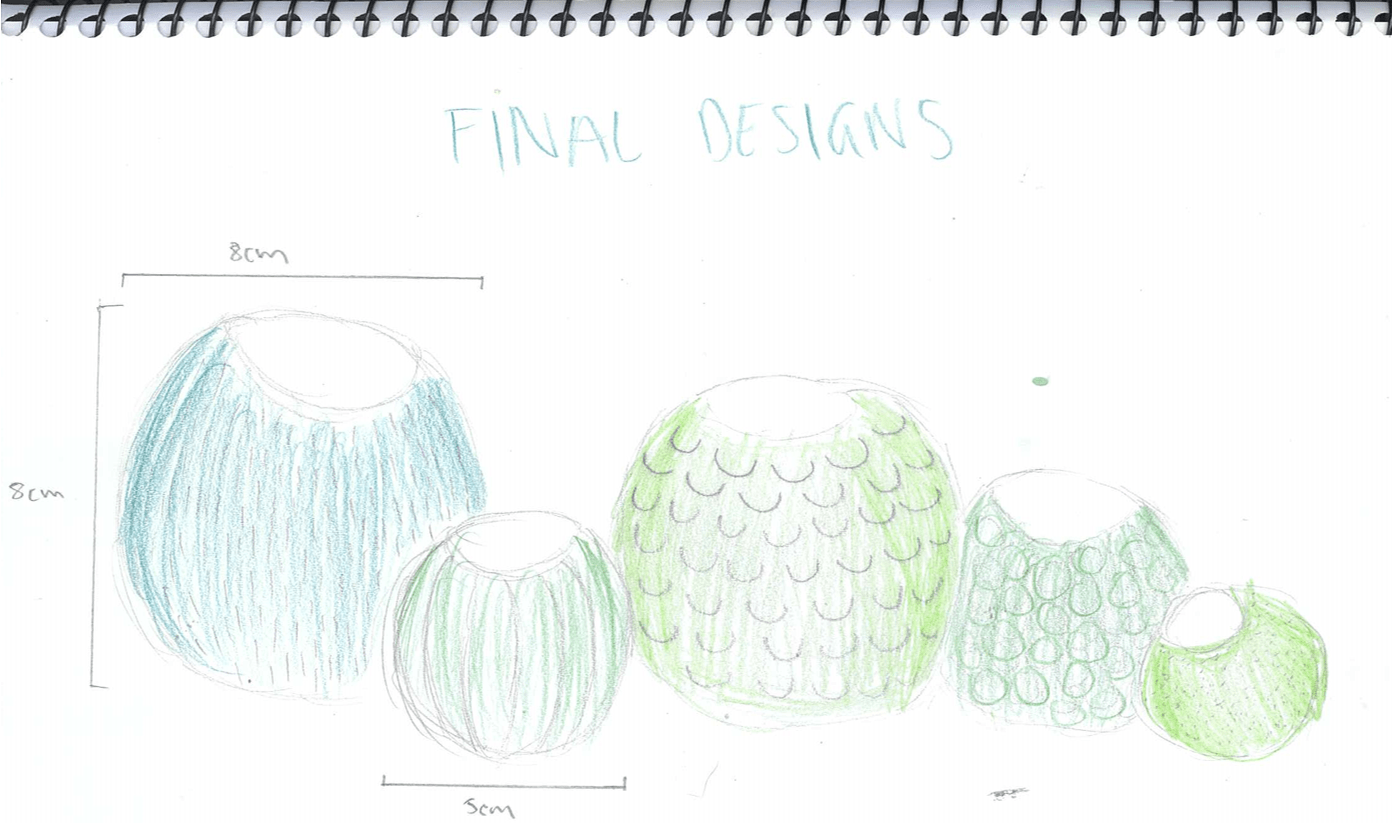
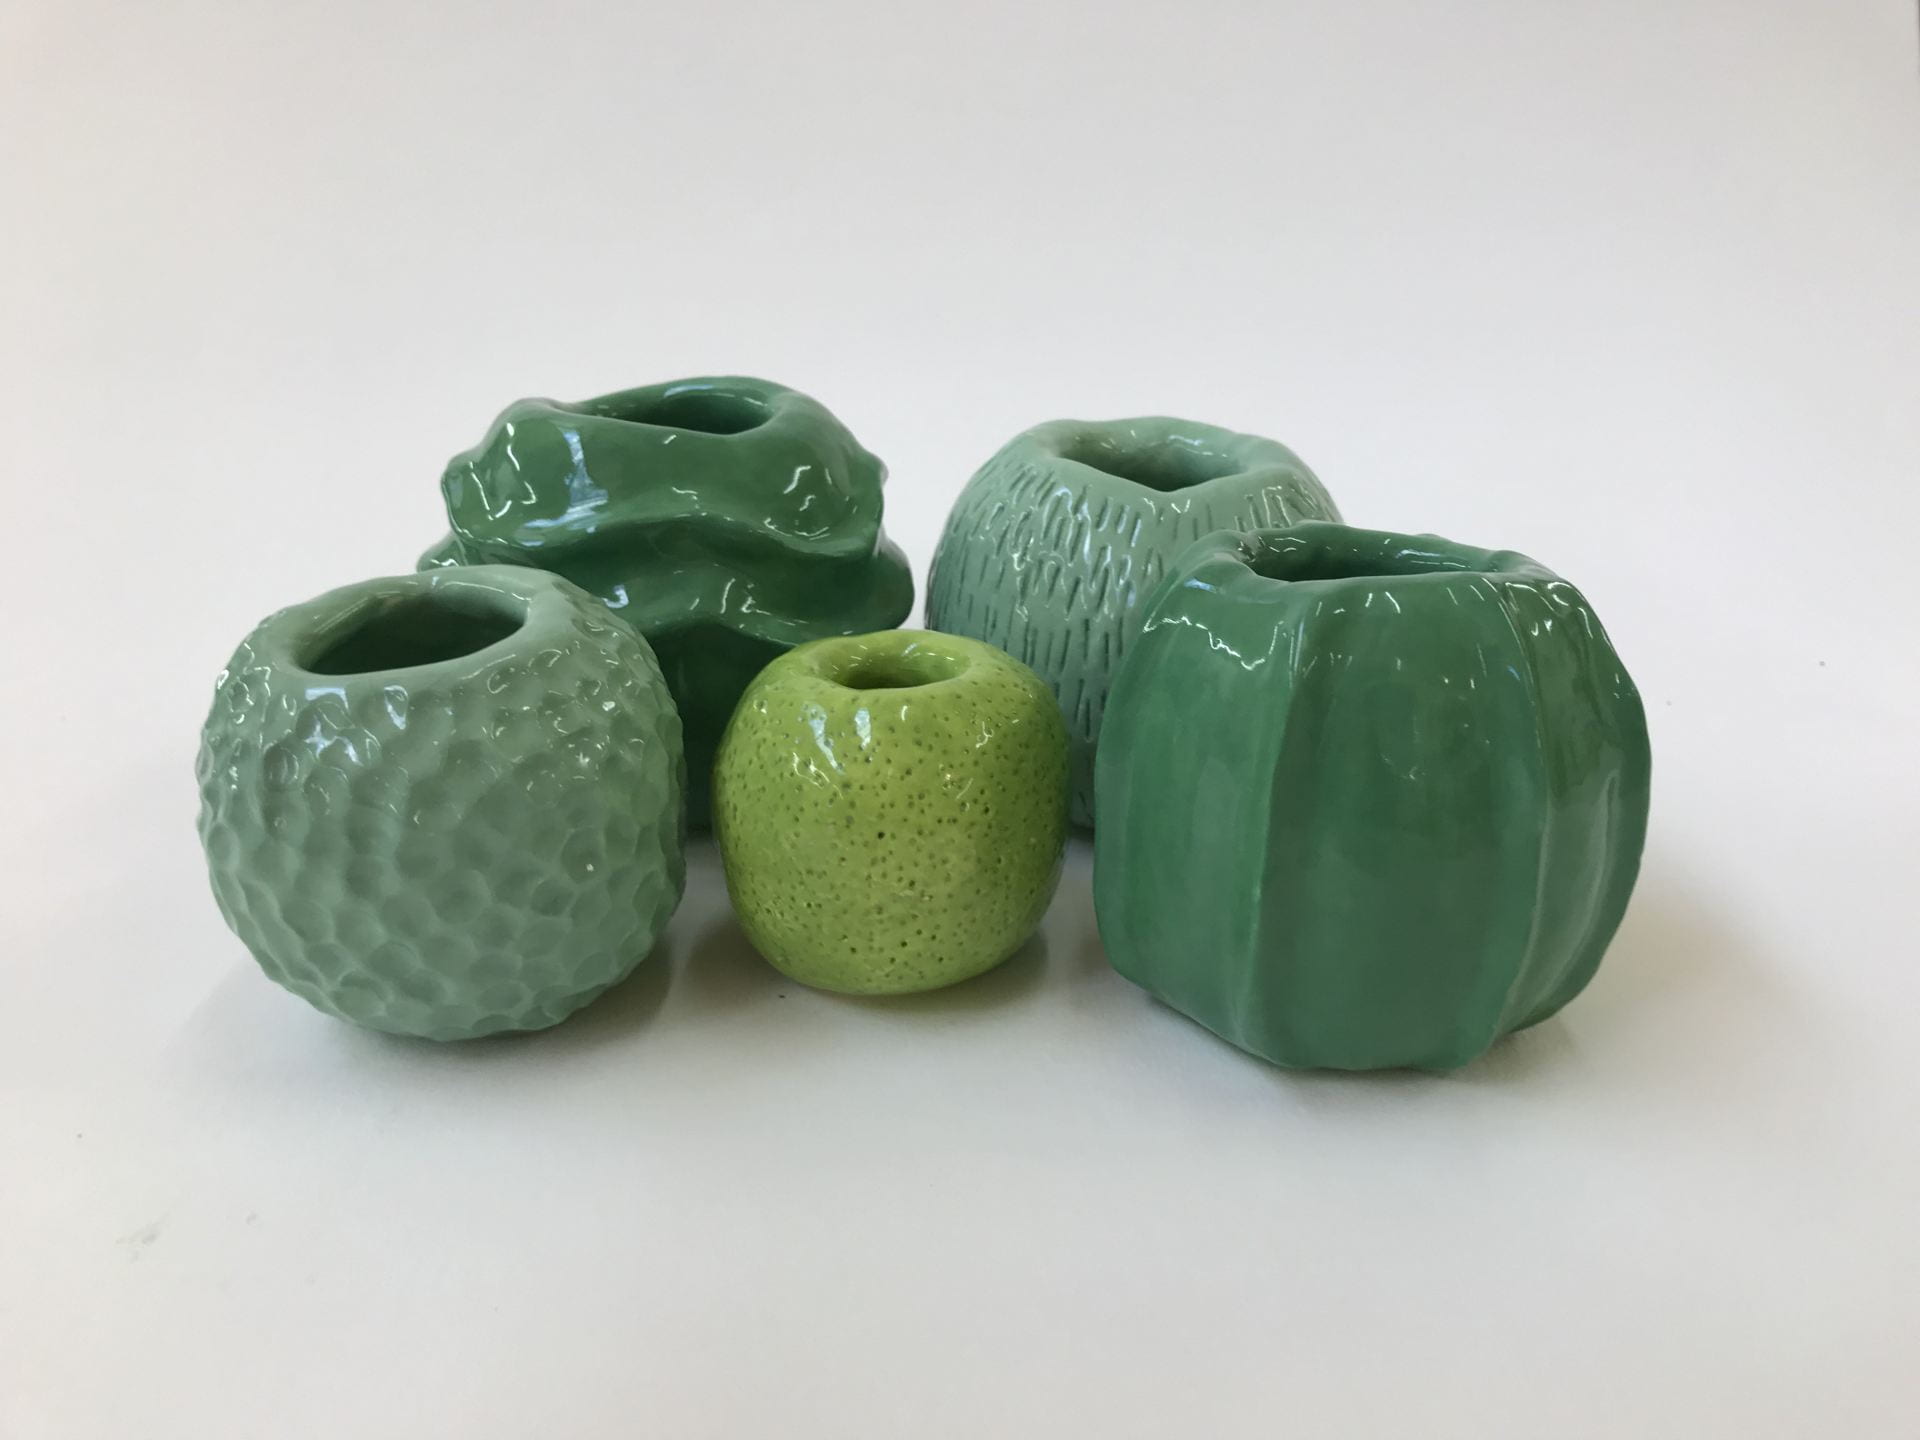
Before we started using the clay to make pots, we needed to think of designs that were unique. This was where we had full creative control over our pots. The idea of creating a set of pinch pots that varied in sizes and all revolved around a theme appealed to me. I brainstormed several ideas, including animal patterns, leaf shapes and finally settled on succulents.
All of my ideas and final drawing of my pots were sketched in my visual diary so that I could attain a clear picture of how my pots would look.
After all of the preparation and planning, we finally started creating the pots. This is where some problems occurred…
Problem Solving:
One problem that I faced was that the clay was very soft and wet when it was fresh. This meant that it was hard to create neat and polished textures and piercings. To solve this problem, I cut the clay into the shape that I wanted, then left it outside of the humidor (for the rest of the lesson), attempting to dry it out a little bit so it was easier to work with.
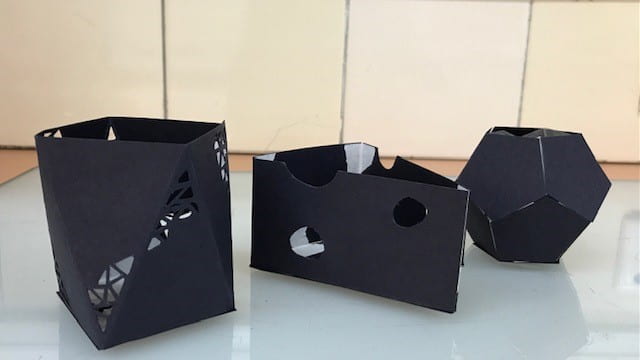
It was easier to make precise cuttings in paper than clay.
Another problem that occurred in the class, was that the glaze on some people’s fired pots cracked. We assumed that this was because there were too many layers of gloss glaze. I didn’t experience this problem, however, I made sure that I learnt from my classmates’ mistakes and applied no more than 4 layers of gloss glaze on my final pots.
I also realised that due to my lack of planning, I hadn’t thought through how I was going create all the different pot textures before sketching my final design for my pinch pots. For two of the pots replicating the design was more difficult than I had envisaged and I then had to think of a new texture. After a bit of thought I had a light bulb moment and realised I could add clay to my base pot to create a different look (rather than removing, scoring or indenting clay like I had done for my first three pots). I added clay to create vertical strips to make it look like a succulent (the look I was going for). I used this idea as an inspiration for my last pot and ended up creating 2 lines of clay that wrapped around the pot. This made my collection of pots interesting to look at as there was an assortment of sizes and textures.
Being Organised:
When you work with any type of material where the final product has to be dried (like paint or clay), it will always take extra time after you have completed your art. This means that I had to organise my time to be efficient.
In this project, there were 2 main factors that added onto the time that it takes to complete the artwork. These were the time it takes for each layer of glaze to dry, and the firing of clay in the kiln.
So that I could complete my pots before the semester ended, I made sure that I was using my time efficiently by glazing multiple pots at once so that by the time one pot was glazed, the other pots glaze had dried and were ready for another coat.
When my pots were in the kiln, I was documenting the processes and adding images to my visual diary.
After participating in this elective, learning all about the different processes and gaining new skills, I have discovered my passion for creating 3D art using clay and using different tools to create different textures. In the future I would love to use clay in my art projects again.