The overarching task for this engineering challenge was to design a building structure that would withstand a simulated major earthquake. We were required to design, build and test a small scale model that met the criteria of: quick + easy to assemble, minimum height of 60cm, max base of 25x25cm, remains standing after simulated earthquake (10secs), use materials supplied (spaghetti sticks and blu-tack), and cost a max of $60. The cost of materials were: $1 per 10cm of spaghetti and $1 per 1g of blu-tack.
Our group (Genna Ho, Joy Kim and I), gathered together to assign our roles. My roles were project manager and the reporter, Genna’s role was Equipment manager and Joy’s role was the speaker. I was tasked with making sure everyone could understand the challenge given and keep the team on track. Being the reporter as I had to make sure that the final presentations and questions on Stile were answered on time. Genna had to make sure that the materials needed for each building session were available and that everyone cleaned up after. Joy was the reporter which meant that she had to seek help from teachers, other classmates or outside experts. We all had different strengths that contributed to this project. All of us contributed to the ideas and research, although Genna did some more extensive research. Joy communicated with other groups and sketched the designs as we built while Genna and I constructed the building. I did the designs and drawings for our last prototype while Genna and Joy did the others.
Even though those were our proposed roles for the task, we all contributed equally to the task at the same time, staying on track with our roles. I had to make sure that we were up to date with the deadlines and organised, so I created a Teams chat and a Microsoft To Do with added deadlines so we could finish all the tasks on time. This helped us to be organised and ready for every deadline for the questions. We recorded the process overtime and here are our results:
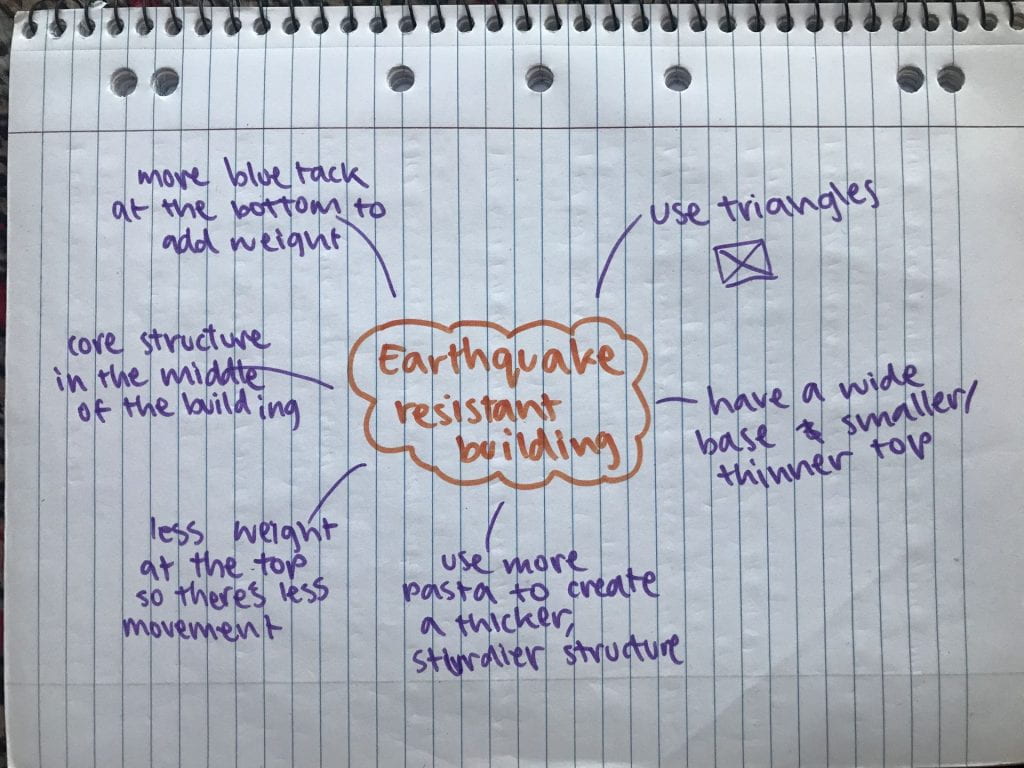
On the 1st of November our group conducted the research for this project. We came up with several ideas of how we wanted our building to look like. We found that having a heavier and larger base will keep the building stable and that cross bracing will be useful to make sure the building doesn’t collapse on the inside. We watched some videos of other schools around the globe do this same challenge and got an idea of what our building would look like. There were also many useful videos made by seismologists that explain how earthquakes occur and what type of building structures would withstand an earthquake. This research was a substantial part of the process because we were able to create designs with the knowledge, we earned from it.
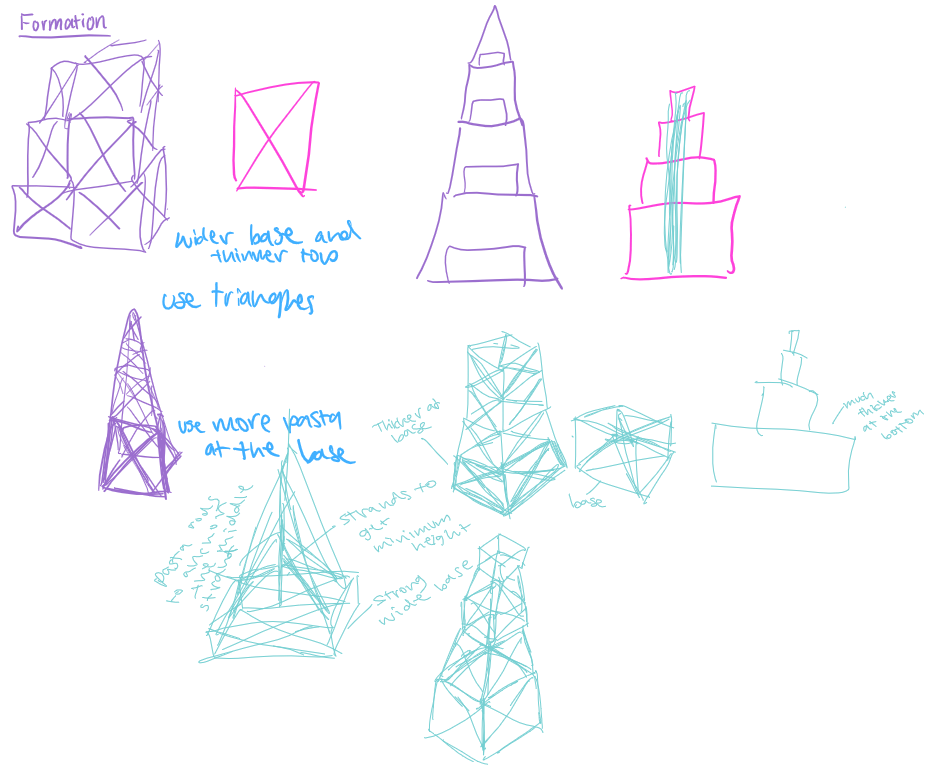
On the 5th of November, our group had come up with a design that used some parts from the research. When designing this, we came up with the hypothesis that the base would cost a lot of money but it would be very strong. This hypothesis was indeed discovered to be true as when we were building it, the base was very sturdy (video of us shaking our base inserted below). We did manage to build the structure, but only up to the 2nd layer; the top 2 layers fell down. So, we concluded to re-design the structure with a triangular base instead.
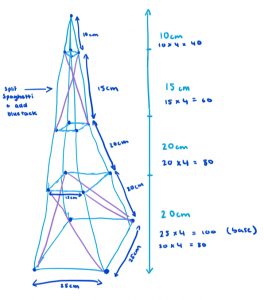

The triangular base was in fact a much better alternative as it used up less money, proved to be more stable, and was much stronger than a square. On the 11th of November, we drew up a new and improved design that worked the best out of all the previous designs. This design was officially our second prototype. It followed the same structures and height of our first design, but the square bases were changed into triangles. The total cost of this design was calculated to be approximately $45.85 out of the $60 budget. This design was very successful, and we all were very elated by this. We simulated the earthquake on the shake board and the structure did not collapse, we found that it was surprisingly flexible (possibly due to the absorption of energy produce by shaking). A link to the shake test: https://allsaintswaedu-my.sharepoint.com/:v:/g/personal/l24hog_allsaints_wa_edu_au/Ef1fJsz_7WBHrARXTqGv1gkB2Ikn4QWKsgN1-ssxhCsL7w Not only did this design pass the shake test, it also cost very little; this opened up a new challenge for us.
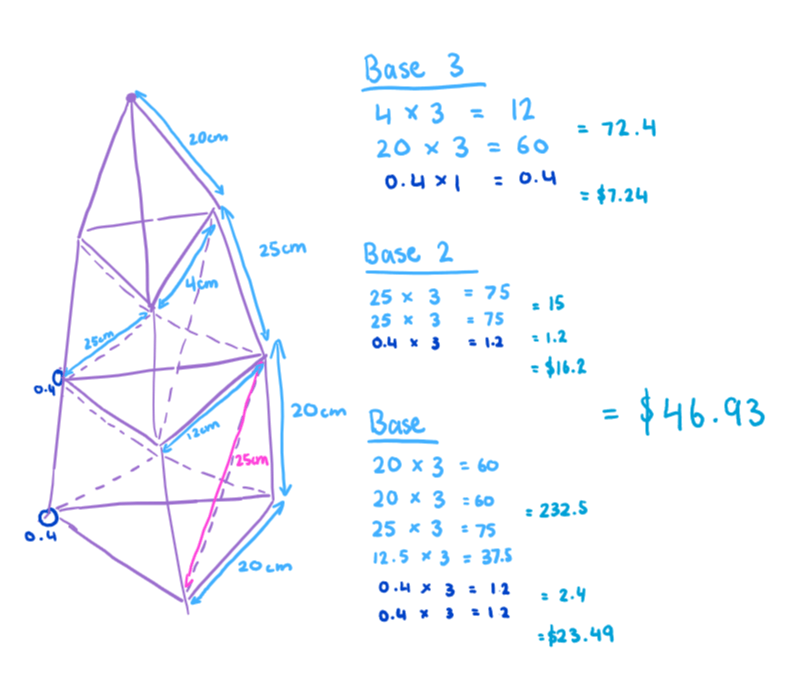
The new challenge for our group was to make the structure taller by adding another layer, whilst still being within the budget. Our options were to add a layer on top or add a layer on the bottom. We chose to add a layer on the bottom, which was probably not the brightest idea because it would’ve taken much more material to make than adding a layer on the top instead. On the 19th of November, we had a design for the improved building ready. Since I did not have the material with me when I was drawing this design at home, I had to hypothesise how much of each material I would have to use.
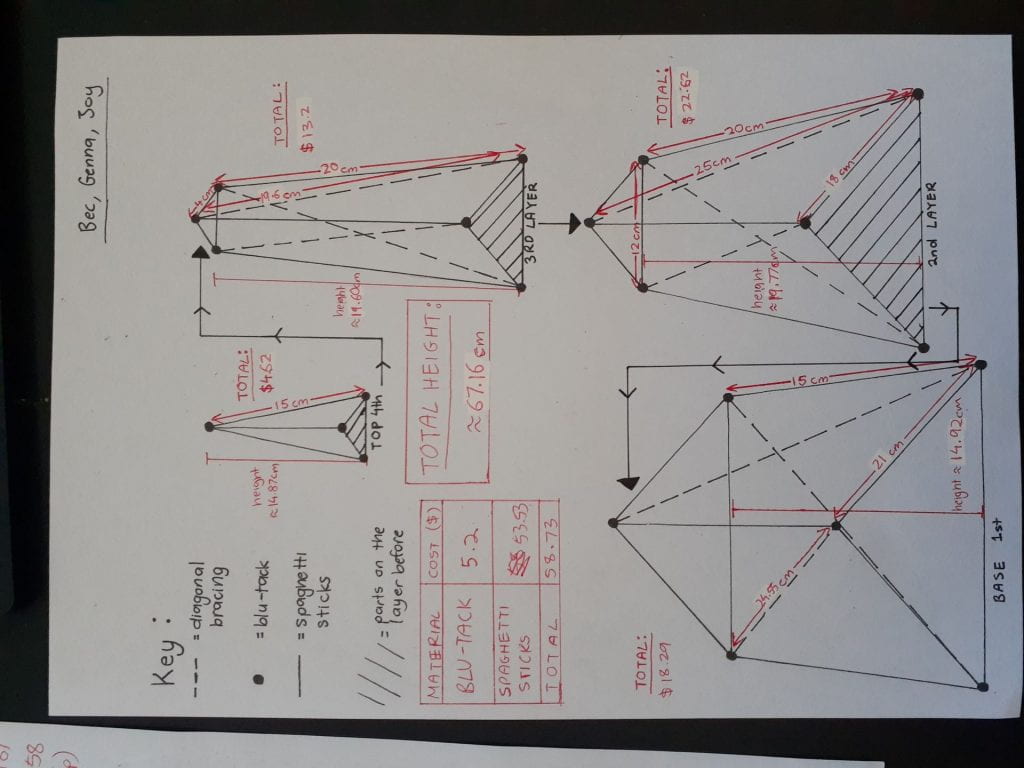
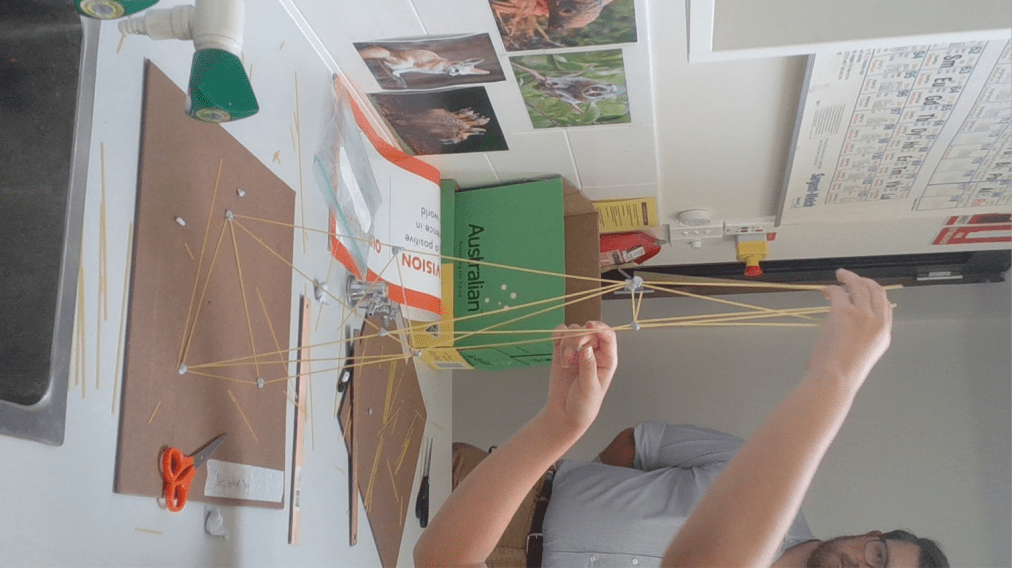
Unfortunately for our group, this design was a failure and did not work out for a few reasons. A few calculations was wrong in the design, the blu-tack had been left out in the open for a few weeks so its strength had deteriorated, the building kept collapsing, and we kept breaking the pasta sticks. These factors all contributed to the result. Towards the very end of the lesson on the 19th, we tried to add a layer on the top instead of the bottom, but as we ran out of time, we didn’t have the chance to build it successfully. In the end result, we came to the conclusion that only the 2nd prototype worked.
In the future, if I ever encounter similar tasks without boundaries like the boundaries that were placed for this task, I would extend my materials and use something sturdier than blu-tack. If we had a larger budget, we wouldn’t have to worry about going over it. I also think that if we could’ve had a larger time frame for this project, we would’ve been able to figure out how to fix our last prototype. There were many restrictive boundaries placed on this task and there were negative and positive sides to it. The negative would be that they limited our build (eg. materials, time, measurement limits). The positive would be that in reality, if we were tasked with the same engineering project, only with real constructing materials and on a larger scale, we would have to take into account budget, time, and materials.
The process of this task was challenging indeed, if I were to do it again, I would make sure to get feedback from peers and teachers to ultimately make sure our first design fits the task criteria. Through this research, design, test process, I’ve learnt that without planning and researching, the result won’t be as good compared to if you planned first. I used many capabilities lie collaboration, problem-solving and creativity throughout this engineering task. Though this task took an extensive amount of time and effort, the results proved to be worth it.
By Rebecca Lee