Amulets and Talisman Project Response

During Semester 1 2022, I chose Art, Sculpting. In this class we worked on creating our own Amulets and Talismans. On this Journey we also learnt about how Amulets and Talismans came to be. We even got to find inspiration for our Amulets and Talismans by seeing the WA museum. We also went to an art gallery and observed lots of exhibitions.

Did you meet your Targets throughout the project?

I Believe I did meet all my Targets as I finished my Amulets Design by the due date and Finalized it. I also met all my non-amulet related targets such as finishing all the visual diary requirements.

How did you Develop your Designs?

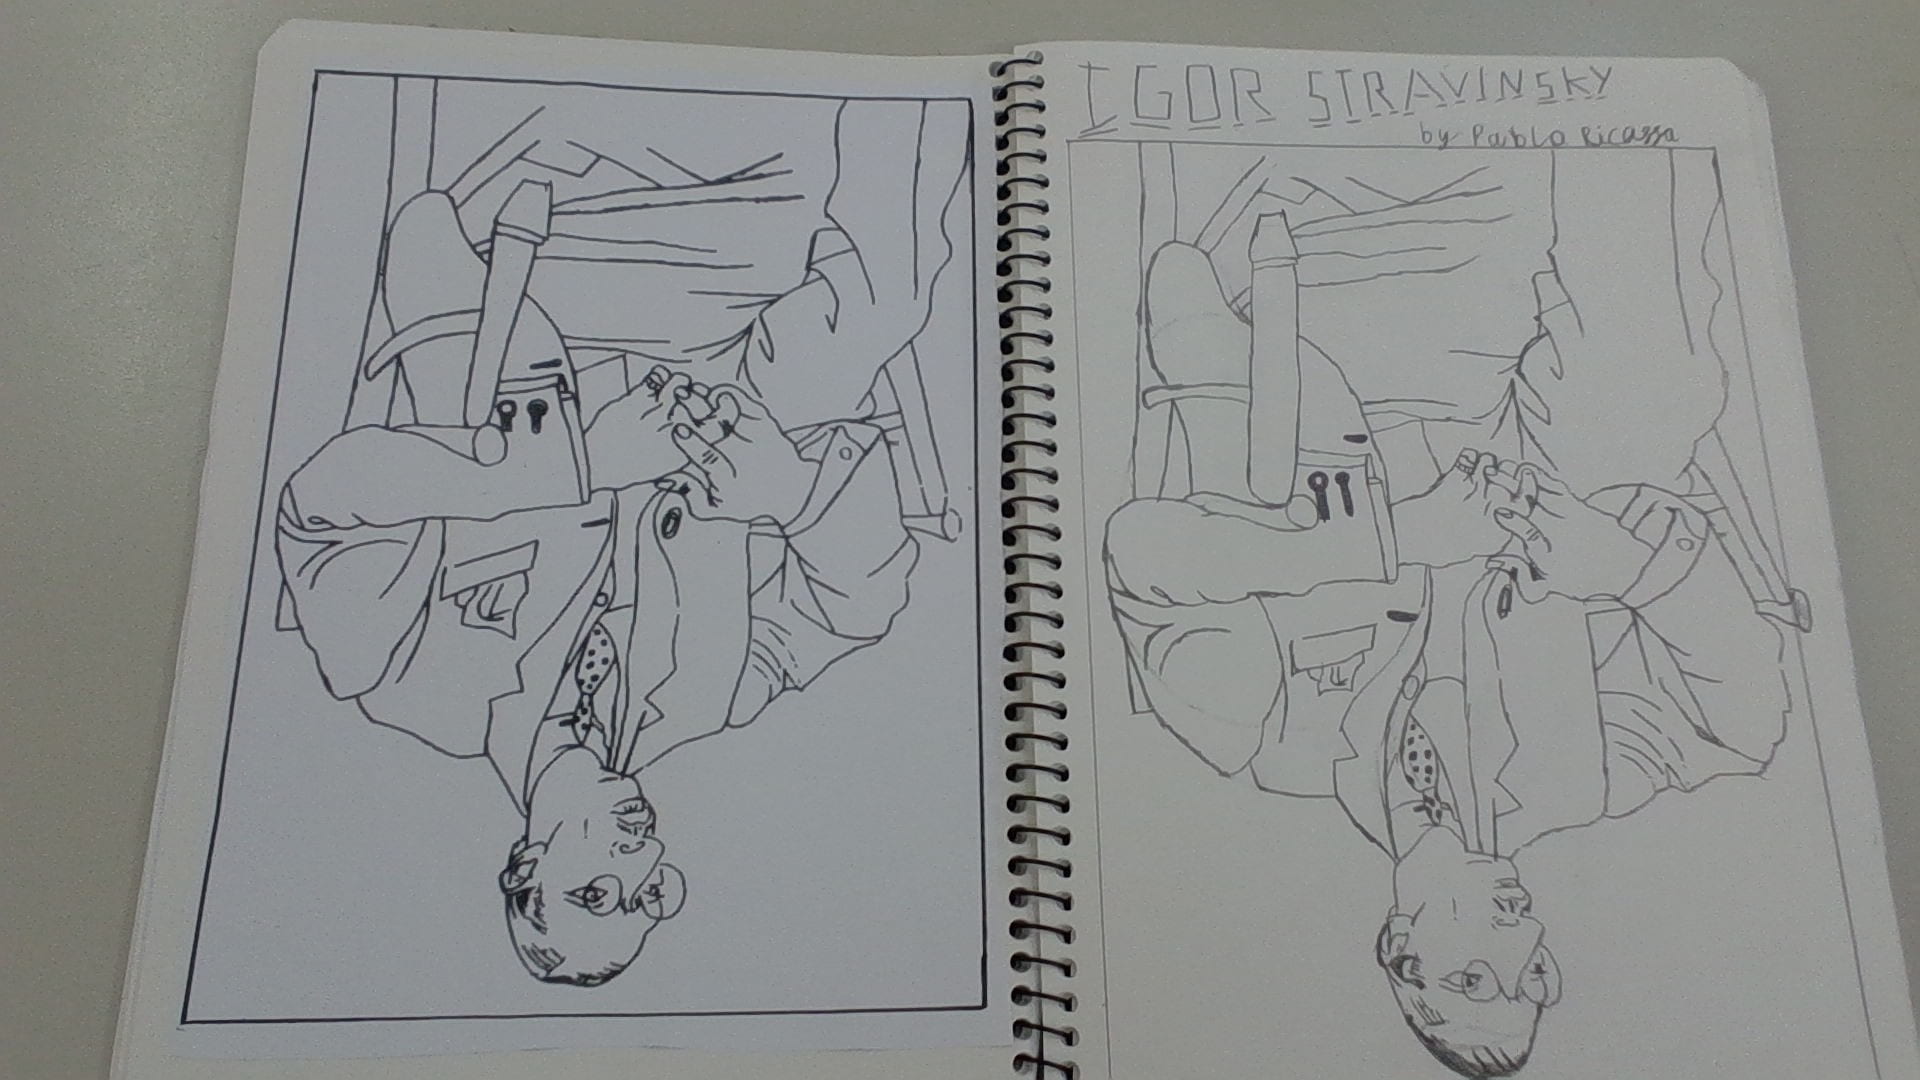
I developed my designs through sketching them in my visual diary, my design I had in my mind changed a lot based on the process. Despite this I am very happy with the final outcome.

Production of the Amulet/Talisman

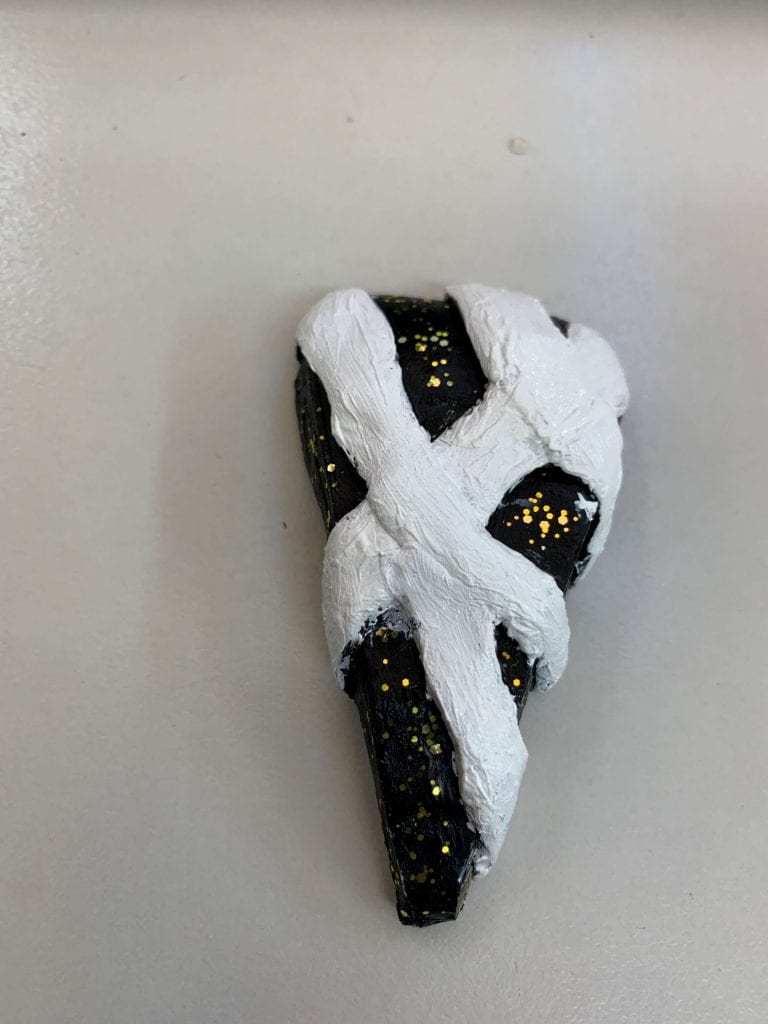
The shape of my Amulet did not change during the production. The shape of my Amulet is a sort of curved Triangle. I got the inspiration for this odd shape from a video game I play. The shape worked really well and made my job of constructing the pinky-sill box much easier as I only needed 3 sides rather than 4. Unlike this however the rest of the Amulet was changed completely. The original theme being a sort of futuristic theme using golds and blues. I even planned to make a hole in the center displaying an orb of some sort. As the project continued I realized that this was a little bit out of my reach so I recreated many new designs that conformed with the curved triangular shape of the soap I had carved. The one I settled on was the shape with bands going over over it. This section of the new Amulet design was inspired from the Marvel show “MoonKnight”. I really liked the design of his armor and implemented it onto my amulet. Of course I did make changes. One of the main changes I made was painting the Final job black and using special moldable plasticine to create the bands that wrapped around some of the Amulet. These bands were painted white (Like MoonKnight). My final touch to add to the amulet was an accent colour of sorts. I decided to this as the only colour of the Amulet was White and Black. I did really like the design but for it to stand out it needed more colour. To solve this problem I chose gold flakes. I painted a small amount of these flakes between the bands as the gold flakes stood out even more on the black job.

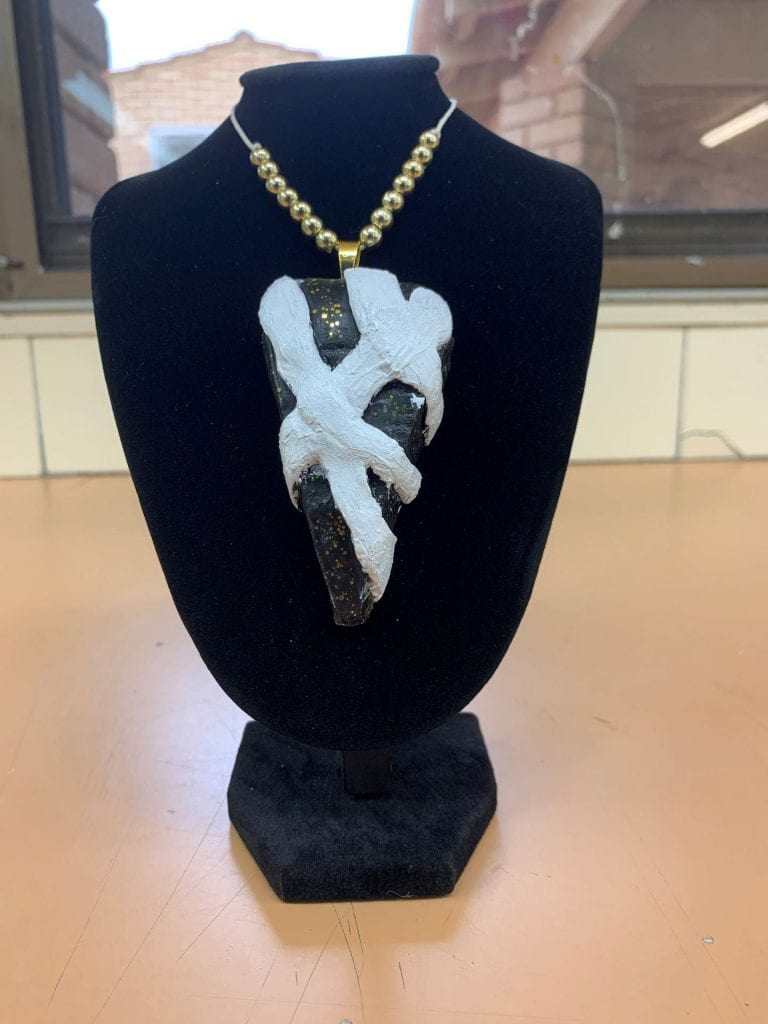
Finished Product Images

Finished Product
Finished Amulet on display stand (Including necklace)

What next?

The next step in the project is adding a string. An Amulet/Talisman needs to be a Necklace after all. As of now I have 2 ideas for the string. The first being white bands like the ones the wrap the amulet. The second being a darker black string with same scarce amount of gold found on the job itself. But we will have to see what happens next.

Safe Driving in WA

Campaign AD:

Planning a road safety campaign:

Why is Road Safety an issue for younger people?

Road safety is an issue for younger people because most are inexperienced in driving and are much more prone to making mistakes. Especially during hours where vision is partially impaired such as night time. Younger drivers also lack the maturity that older more experienced drivers possess which could lead them to make rash decisions and take unnecessary risks.

Reducing P driver crash risk : VicRoads
Late-night crashes

———————————————————————————————————————————–

Why is this source reliable for young drivers to refer to?

The source above is reliable for young drivers to refer to as it contains a balance of humor and seriousness. Funny things tend to stay in the mind of younger audiences. The message is also short and sharp. Long paragraphs of information will deter young drivers.

———————————————————————————————————————————-

What results do you want to achieve?

The results of this campaign are simple. It is so young drivers will drive safe and only whilst sober.

———————————————————————————————————————————

What information does the target audience need to know?

The target audience is young drivers from All Saints’ College. These new drivers need to be aware of the dangers of driving under the influence and/or illicit substances.

———————————————————————————————————————————-

Why is the message going to influence young drivers?

This message will influence younger drivers in All Saints’ College because of its sharp and to the point message and its humor via turning a fellow Student (Howard Shen) into a fictional authority figure. With a familiar face and easy message it has a high chance of staying in the heads of young All Saints’ drivers when behind the wheel.

———————————————————————————————————————————-

What is the best way to deliver this message?

The best way to deliver this message is by placing the poster in places where it will be easily viewed by the target audience. In this case a social media site such as Instagram or a common place of meet within campus grounds such as the canteen are ideal locations.

———————————————————————————————————————————-

How will the campaign be presented to young drivers?

This campaign will be presented to young drivers through website links or the previously mentioned areas (Social Media, common areas on campus etc.)

———————————————————————————————————————————

E-portfolio questions:

What were the biggest things you learnt while completing this task?

The biggest thing I learnt while completing the task is time management. While this is unrelated to driving it is the most prominent thing I learnt. Health is a subject that doesn’t appear as priority compared to other subjects such as Math or English. However it does provide information worth retaining. So during this task I learnt how to balance Health with the other subjects I had to do. While this wasn’t easy, especially with Math and HASS exams looming closer. I did get much better at staying on top of all the subjects that demanded things of me. As for the subject matter. The biggest thing I learnt was the use of headlights during different times in the day. Before learning this I had no idea that a car could dim its lights. However now thinking back it would be quite dangerous if they couldn’t as it poses a threat to drivers in lanes moving towards you.

———————————————————————————————————————————-

What is one piece of advice you would want to pass onto young drivers above all else?

I myself am not an experienced driver. In fact I have never even driven a car. However if I did have some advice to give drivers even more junior to myself it would probably be to know your car. All cars are different. Of course they all have an something resembling an engine and most have 4 wheels. However knowing how your car drives and its limits can be the difference between life and death. Yes, these life-threatening situations are rare but its better to be safe than sorry.

———————————————————————————————————————————-

Write a pledge that you will commit to when you start driving. Why did you pick these things to commit to? How will you stick to these commitments?

Pledge:

I, Ayush Atre pledge to be the safest driver I can be once I receive my drivers license. I will also possess a responsibility to my car: which I will service whenever needed, My passengers: whom I will protect whilst I am behind the wheel. An example of this will be not taking unnecessary risks no matter what, and myself whilst always following traffic rules and consistently making the best decision in any given situation.

Bull creek water testing reflection

The SDG that I’ve worked on for the last semester is goal 14. Otherwise known as Life underwater. Goal 14 focuses on the safety of water and making sure that all water bodies are clean of pollution and save endangered aquatic animals.

The target I focused on here is analysing whether or not a river is polluted at the chemical level. Sometimes a river may, look clean but it’s pH could be very acidic or it could contain larges amounts of ammonia. My project in particular focused on Bull creek. Bull creek is an artificially made water body with the purpose of being a deposit of all of bull creek’s waste water. This extremely dirty water will get cleaned as it passes down the river. The end goal of this is to clean the water before it reaches canning river.

Bull creek has been doing this job since it was 1968 when the river was dug out. The creek was actually named after an early settler by the name of Henry bull, who owned the land since 1830. Before the settlers came, the creek was already a very wet place. In fact it was very significant to the Wadjuk Beeliar tribe. They referred to this wetland as the “Gabiljee” meaning water place.

My project involved many chemical and physical tests down at bull creek to answer one major question.

“Is bull creek doing it’s job?”

My plan was to make write a scientific report on my findings and compare test results from 2 different sites. The first site was at the beginning of bull creek. This water is expected to be dirty here as this is the place where all the sewerage feeds. The second site is located at the end of the bull creek. This sight is behind Rossmoyne senior high school under a bridge. The water here should be cleaner as it’s only a few metres from depositing into canning river.

Me at site 1

This project is part of goal 14 as it’s focused on helping water quality at the local level here, in bull creek.

Me at site 2

During this project I worked by myself. This meant that I could work at my own pace. During my time on this project I often took breaks and helped my classmates with their projects. Of course I would always get my work done in the end.

In the beginning my goal was to create a scientific report to express all the data I was going to collect down at the creek. It took a while get approval to leave the school and do testing so in the mean time I practiced using the pH indicator and the other tests (Ammonia, Nitrite, Nitrate) on tap water. Curiously while doing this I noticed that the hangar’s tap water is highly alkali.

Once given approval to go down the creek I got to see both sites for the first time. I took with me, two 2L bottles to hold the water from each site, A salinity tester and a bucket. The salinity tester also doubled as a thermometer. This was useful because the temperature would’ve definitely changed by the time I got back to the hangar. During this I had to try and memorise each the temperatures of each site and which bottle holds which sites water. I should’ve planned this part ahead of time. When I got back I entered in my first results and got to testing.

TERM 3Site 1 (No band)Site 2 (Red band)Averages
Temperature (At site)26.9 C24.6 C25.75 C
Temperature (In bottle)20.1 C19.9 C20 C
pH6.97.77.3
Salinity0.40ppt0.40ppt0.40ppt
Ammonia8.0ppm3.0ppm5.5ppm
Nitrite0ppm0ppm0ppm
Nitrate0ppm0.25ppm0.125ppm
    
ConsistencyClearClear 
ColourYellowYellow 
Debris types:Brown clumped substance, worm thing, Live mosquito, small organic particles, sand, dirtDirt, sand, Small plant roots 
Test results 1

The first test was a huge success and now with the data I’ve received I can start to work on the report. The first few stages of the report were very simple. I needed to write a hypothesis and materials. I even learnt how to write additional parts of scientific reports that I’ve never known about previously. For example a risk assessment.

Finally came the day when I would do, what I thought would be my final journey to bull creek. I emptied the water from the previous tests and cleaned them and my other materials. Mind you, these two testing dates were months apart. I was very curious how different (or similar) the results would be.

TERM 4Site 1 (No band)Site 2 (Red band)Averages
Temperature (At site)23.33 C26.7 C25.015 C
Temperature (In bottle)19.0 C18.9 C18.95
pH8.18.68.35
Salinity0.40ppt0.40ppt0.40ppt
Ammonia6.0ppm0.503.25
Nitrite0.5ppm0.5ppm0.5ppm
Nitrate0ppm0ppm0ppm
    
ConsistencyClearClear 
ColourYellowGreen 
Debris types:Small swimming insects, debris from flowers,Lots of green vines (Appears to be growing), organic debris 
Test results 2

The second test taken in Term 4 was very different to the first test, just as I’d hoped. Unfortunately though, a problem came up. Amongst my plethora of tests I had two pH testers. One was a digital stick and the other was a solution based indicator. The problem lay with the data collected from them. The two pH testers gave me drastically different results. Perhaps the digital tester was calibrated wrong or the solution test was diluted. The only way I could find out the true pH was to use a Universal indicator.

So, with the help of my teacher Mrs Donnelly, I borrowed one from the science office and tested both term 4 sites again. Unfortunately I couldn’t test the term 3 sites. But this was better than doing nothing.

TERM 4Site 1Site 2
Universal indicator pH66
Universal Indicator results

The universal indicator test has shown us that the previous results were largely exaggerating the rivers alkalinity. Instead both sites sit at a pH of 6.

Of course, the only thing I’d do differently was to use the universal indicator on all 4 tests rather than the later two. This wasn’t possible because by the time I realised the error in the pH tester the Term 3 tests were long emptied. Maybe next time.

The end of goal of my task isn’t yet finished as I still need to compare the data against each other and again with the ideal river qualities. This leaves two options. Either bull creek is doing its job. Or not. If so then we can leave it or monitor it incase something changes. If it isn’t then I will start a new project on how we can fix this and make sure bull creek functions as it should to make a healthier canning river.

During this project I found that I had improved on my

Finally, I would like to thank my Teacher and classmates for helping me with all of the testing and being patient with me as I dragged them down the creek for testing every so often.

Engineering Project Y9

Term 4 science was centered around the Earth. My classmates and I studied hard on volcanos, sections of the earth, deepest points on earth and water and most importantly, Earthquakes.

The project my group (Jaxon, Zaid and Marcus) and I worked on was to create a structure out of raw spaghetti sticks and blue-tac. Raw spaghetti is very brittle so this wasn’t going to be an easy task but my team and I were up for the challenge.

The first stage was planning. During this we made up to 11 different sketches of how the structure will look. This included notes on earthquake resistant build techniques implemented by real world scientists and engineers. The most prominent build style was cross bracing.

Cross Braced Frame with Pinned Braces - Expedition Workshed
Cross braced structure

Cross bracing is a technique used by engineers that involves a cross between two pillars. This transfers weight away from the structure during an earthquake and reinforces the pillars it’s attached to. We included this type of wall on all three sides of our structures.

Design 1

Our first structure was a huge success and it survived the shake test. It also met all of the requirements asked of us. But the problem with our design was the roof. The antenna swayed and appeared as if it would take the roof off. Fortunately it doesn’t but this is a risk that my team and I aren’t willing to take and it easily finds itself on the improvement list for design two.

Design 2

After noting down the parts of design one that needed improvement we reached the building stage. This was the final part of our project. Jaxon had drawn at least 10 different possible sketches since the time the project was released to us. But the final product was a disaster. As the due date drew nearer and nearer the builds became rushed. The first build was built entirely by Marcus but the second time around we all tried to build at once to speed things up. In the end we did implement the improvements and they did work. But it came at a cost of making the rest of our structure less so.

In the end I believe that our group worked very hard on this project. In the end our “Improved” Design was worse but through the way we all contributed equally to the project regardless of the outcome. I feel this was a good learning experience that my group members and I can take to future projects.

Art from the Renaissance

In traditional drawing and painting this year we expanded or drawing skills by starting with some quite unusual tasks. One of them consisted of a drawing of a famous art work of “Igor Stravinsky” by Pablo Picasso. Although the unusual part lays in HOW we drew it rather than WHAT we drew. We drew Igor Stravinsky upside down! I had never done anything like this in art classes prior. Everyone in the class was visibly nervous. Hoping that theirs will turn out good. We did the activity for about 2 classes (3 hours) and the result was astonishing! I didn’t know that it would turn out as well as it did. I was really impressed with my effort!

Upside Igor Stravinsky drawing (Right)

We did some other activities that involved drawings but with an interesting twist. One of which was called the “Le Jockey” by Henri de Toulouse-Lautrec. This drawing was to help us focus on a concept called negative space. Negative space is drawing the weird shapes around the Main attraction of the art piece. In my case it was the horse and rider.

Le Jockey Negative space task

These tasks we did were actually really beneficial to my drawing skills. I learnt so much about the actual techniques that artists use to make their art work stand out. Not just the techniques were important though. The biggest Practice-point I took away was that “ART TAKES TIME”. I feel I always knew this but I never really applied it into my work. Finally I got my chance. It was the day of the biggest project in art this semester, the still life. We had done some practice of drawing still life in the past but nothing likes this. In the center of the room lay the massive still life. It took up two tables and included so many colourful cultural items and plants.

After 2 weeks the still life was over. We all had drew a portion of the massive still life. But the job wasn’t over yet. We needed to move on to the egg tempera.

Egg tempera was a special form of art using eggs, water and special powder to make paint. We use holy colours that consisted of: Green, Blue, Purple, Orange, Yellow, Red and a special small cup of black powder.

Behind the creation of the paint was a process involving the draining of egg yolks from the sack. We did this by first breaking the egg and draining the whites. We learnt a special trick to drain most of the egg white by transferring the yolk from one half of the egg shell to the other. Once drained the egg yolk was placed on a paper towel to absorb residual whites and keep the sack and the egg for the egg tempera separate. Finally we placed it in a little container and added one teaspoon of water and one teaspoon of the holy colour.

Everyone’s paint containers.

Dealing with eggs was very risky and messy and all of us made our fair-share of mistakes. But this was a learning experience and it taught me how to be organised around messy situations and make sure to clean up afterwards. I also got really good at cracking eggs!

After our still life painting was transferred to a canvas and our paints were made. It was time to start painting. In this phase of our project we learnt about layering and using the correct brush for the job.

(Almost) Finished painting on Canvas (Pink is a little faded)

Overall, I found Art this semester really fun. We covered an insane amount of content from simple drawing to turning eggs into paint!

These activities reached into my capabilities as well. But for me, the two most prominent were “Problem-solving” and “Organisation”.

Towards the 3rd quarter of the semester we reached a big problem. The fridge in which our egg paint was preserved in was disconnected! All of our paint smelled horrible and was ruined. This forced us to create new paint to continue our paintings. I used my problem solving skills to get around this. I decided to divide my responsibilities and made 4 paints on the first day and 3 the next. So I had time to focus on not just the paint but my visual diary and my colour composition. Organisation was also a huge part. I needed to keep my visual diary in check and make sure that it was up to date on everything I had done. I even included a little pocket so I could slip in a laminated sheet that would end horribly if glued in.

I learnt A lot in art this year and I would recommend it to either people who love drawing or people who want to learn it.

Statistics

In this task Callum and I studied wellbeing in Year 9 students. We found this by collecting data. This data consisted of the amount of hours that Year 9 Students spent in an average week on wellbeing. Wellbeing consists of activities such as: Sport, Art, Music, Relaxing, Going outside etc. Any activity that makes you feel good. The purpose of wellbeing is to clear your mind and make you feel at peace.

This is a graph showing the hours that each series’ (People) have spent on wellbeing according to the survey

Since our data was in hours this was Numerical data. Although we could have also made a categorical data graph based on the types of wellbeing activities (Physical, Mental, Social).

Box Plot for the data.

Our data we received from the graph

Outliers: 999 and 50 

Mode: 0 

Median: 4

Mean: 30.41

Quartiles: 1 

Range: 21 

Interquartile range: 2

The outliers

The outliers that we found were 999 and 50. It is clear that 999 was someone making a “funny” reply. Although this might have been the saddest thing I have ever seen. This person should improve their sense of humor if they want to go anywhere in life.

Interesting bits of data

In the data we collected I noticed that Exactly 11 people chose 2, 4 and 7 hours of wellbeing. I found this interesting because its quite coincidence that exactly 11 people chose these.

Conclusion

In our data the mode was 0. This may seem quite peculiar. I believe this is because most of the students actually do not know what wellbeing activities include. Granted, the term “Wellbeing” is an umbrella term for a variety of different activities. Making it a very interesting statistic indeed. I believe that our data could be improved by adding a categorical section. This would make our data a lot more reliable.